Table of Contents
Managing Key Frames
When a new Image/Object is added to the Objects and Animation Editor, it just has one Key Frame located at the start of the Timeline.
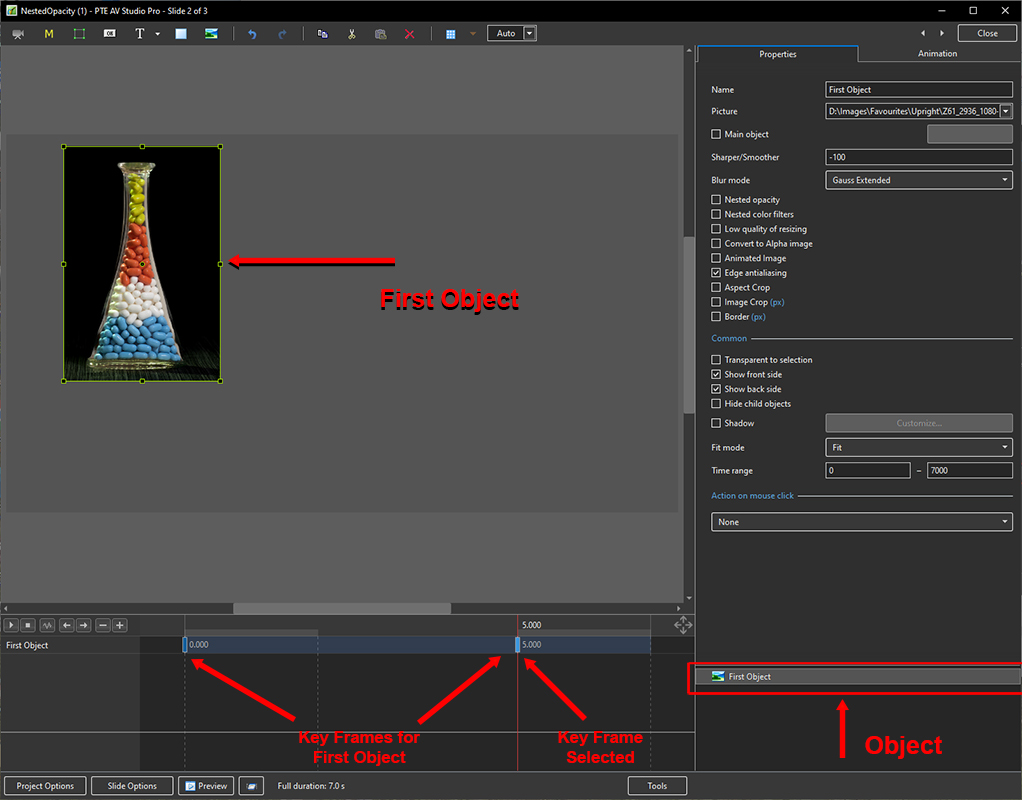
Select Single Object
- In the “Objects” panel, click on an Object to show its Key Frames
- All Key Frames associated with this object will appear on the Timeline
- To select a Key Frame, left-click on it with the mouse
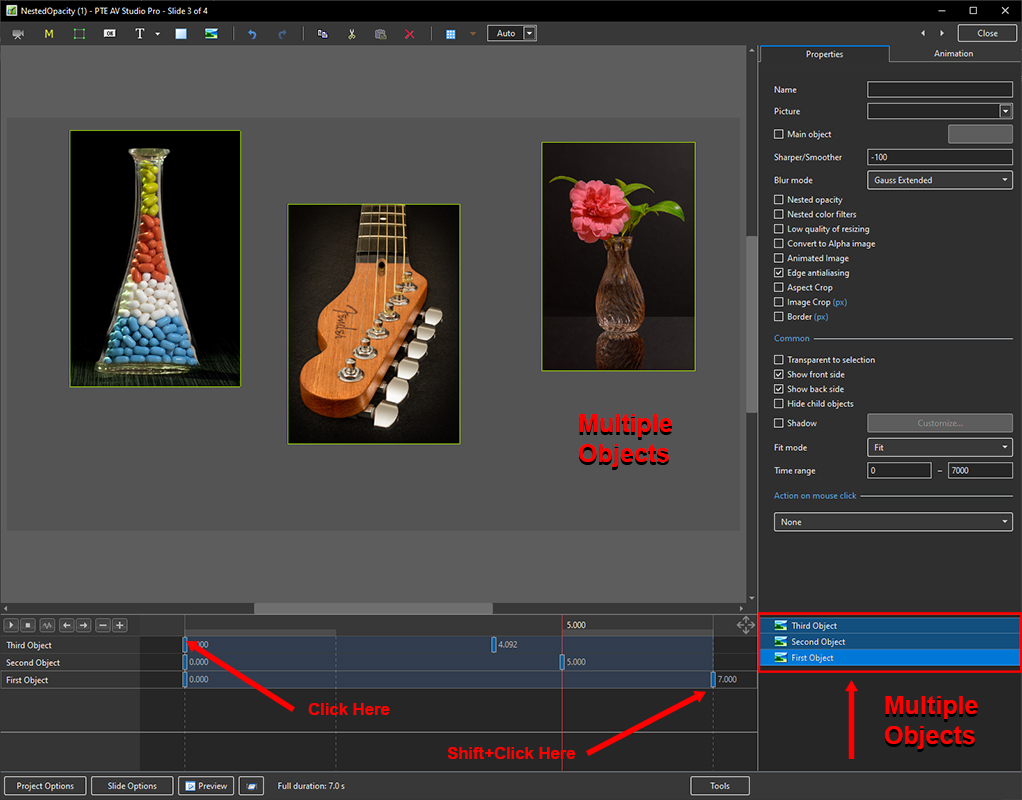
Select Multiple Objects
- Multiple Objects can be selected to show their Key Frames
- To select specific Objects, Ctrl + Click on each object in the “Objects” panel. Key Frames for these objects will be shown
- Click on First Object then Shift + Click on Third (e.g. bottom) Object to select all Objects
- Alternatively, Ctrl + A selects all Objects
- Use Ctrl + Click to select specific Key Frames. The positions and properties of selected Key Frames can then be adjusted
- Click on first Key Frame on top row then Shift + Click on last Key Frame on bottom row to select all Key Frames
- When multiple Objects are selected Key Frame Parameters must be changed in the Animations Tab
Properties of a Key Frame
- The parameters of the Properties Tab are set Globally for all Key Frames in an Object Track
- The parameters of the Animation Tab can be set for each individual Key Frame in an Object Track
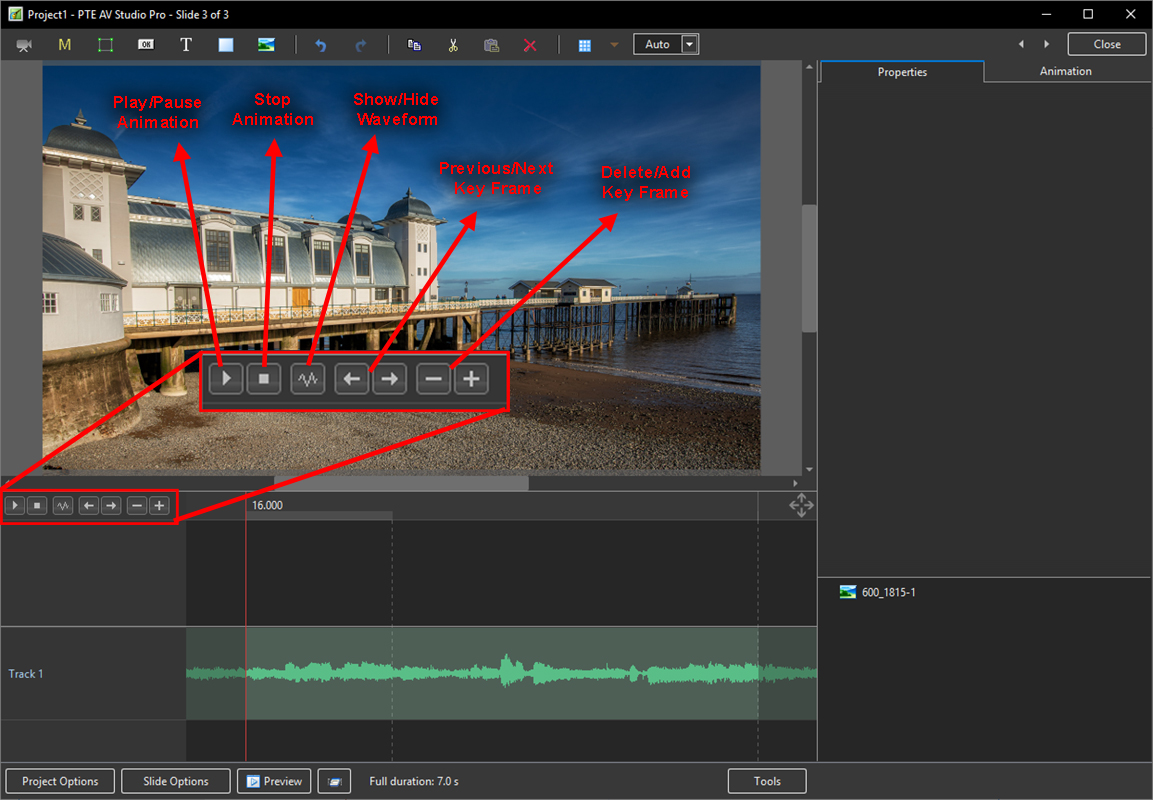
Navigate Key Frames
- Play / Pause - Plays the Animation
- Stop - Stops the Animation
- Show/Hide Waveform - Shows or Hides the section of the Audio Track relative to the Slide
- Previous Key Frame - Go to Previous Key Frame
- Next Key Frame - Go to Next Key Frame
- Delete Key Frame - Delete the Current selected Key Frame
- Add Key Frame - Adds a BLANK Key Frame:
- At the end of the Timeline
- Half way between Current and Next Key Frame
- At position of Cursor
Key Frame Width/Thickness
- The width of a Key Frame can be preset in Settings/Preferences/Editor
- It can also be changed in the Tools Menu in Objects and Animation
Cloning Key Frame (KF)
Adding a Blank Key Frame (KF)
- Select the first Key Frame and click on the “+” icon
- A second Key Frame is added at the Full Slide Duration
- Select the First Key Frame again and click on the “+” icon
- Another Key Frame is added half way between the First and Final Key Frames
- Clicking on any Key Frame and the “+” icon will add another Key Frame half way between it and the next Key Frame
- Adding KF by means of the “+” buttons adds a BLANK KF (all Animation Properties turned off)
- Clicking anywhere on the O&A Timeline other than on a KF and clicking on “+” will add a KF with all Animation Properties turned off
The difference between Adding and Cloning Key Frame (KF)
- When a KF is Cloned all of the parameters from the original KF are duplicated in the Cloned KF
- When a KF is added all of the parameters are Blank so that only selected Parameters will change
Example: To Pan an Image from Left to right we can Clone a KF and drag the Image from its start position to its end position. We might want to adjust the Saturation in the middle of the Pan. By adding a Blank KF we can turn on the Colour Correction Filter and make the necessary adjustment without influencing the nature of the Pan.
Moving Key Frame (KF)
- Click on a Key Frame(s) and drag left or right to change its position, or ……..
- Enter a precise Key Frame Time in the format “5000”
- Select a Key Frame and click on “-” to delete that Key Frame
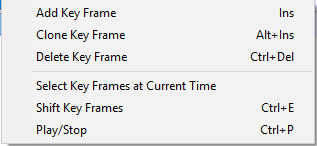
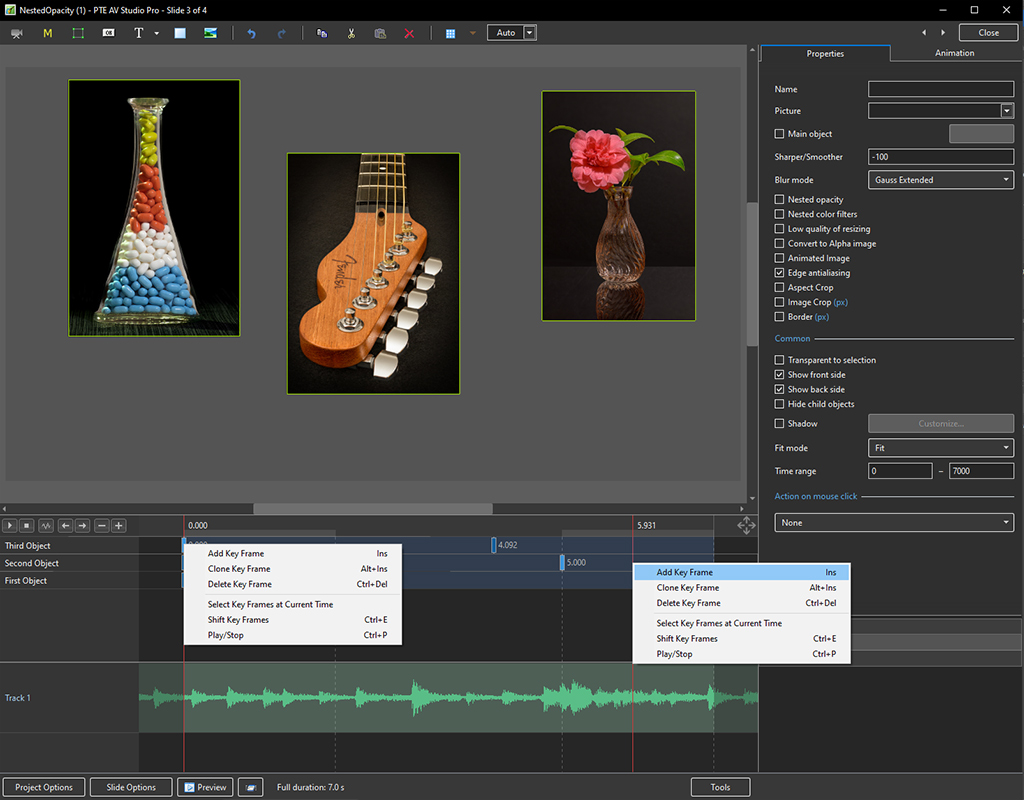
The Right Click Menu
- The Right Click Menu enables options to add Key Frames
- If an existing Key Frame is selected “Add Key Frame Here” will add a Blank KF in the same way as the “+” Button with all Animation Properties turned off
- If the Cursor is selected between KF the “Add Key Frame Here” will add a Blank KF at that point with all Animation Properties turned off
- “Clone KF” will clone the selected KF
- Delete KF will delete the selected KF
- “Select KF at Current Time” will select all KF in Multiple Objects at the selected time
- Play / Stop - Ctrl+P at selected Time
Selecting Key Frames
Please start Video and select Full Screen - Esc to return.
