Table of Contents
Timeline View
See also the Audio Tab in Project Options.
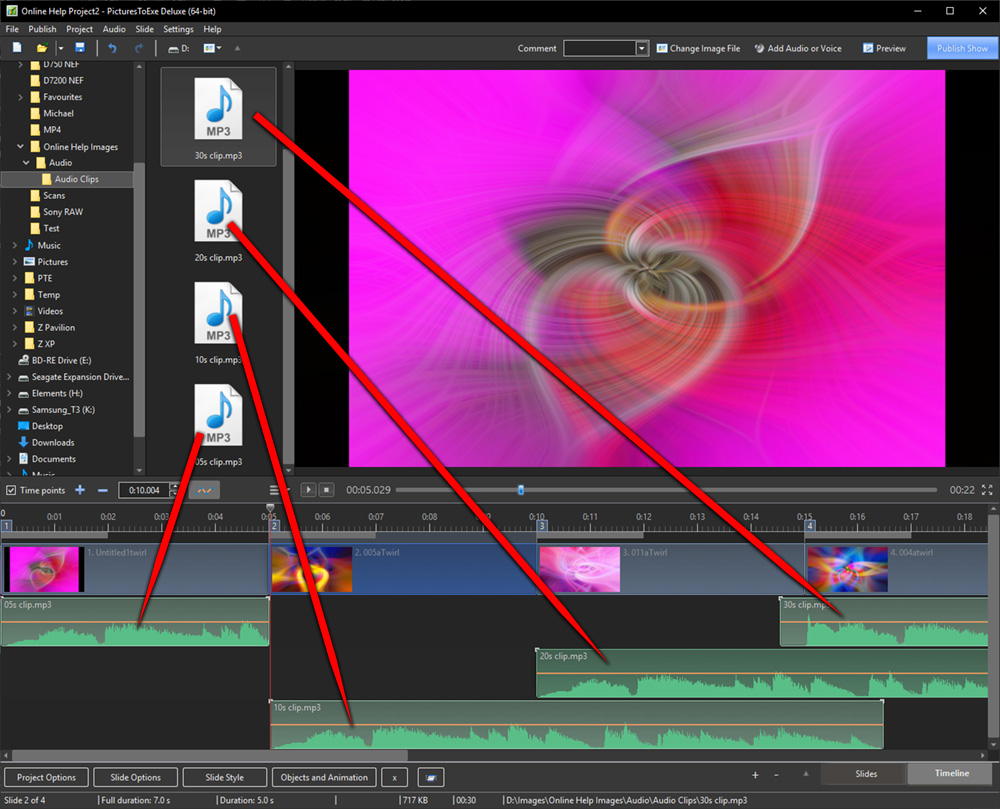
Audio Files can be dragged and dropped into the Timeline tracks from the Files List.
Note that the position (time) of the added audio file is determined by the “drop” action.
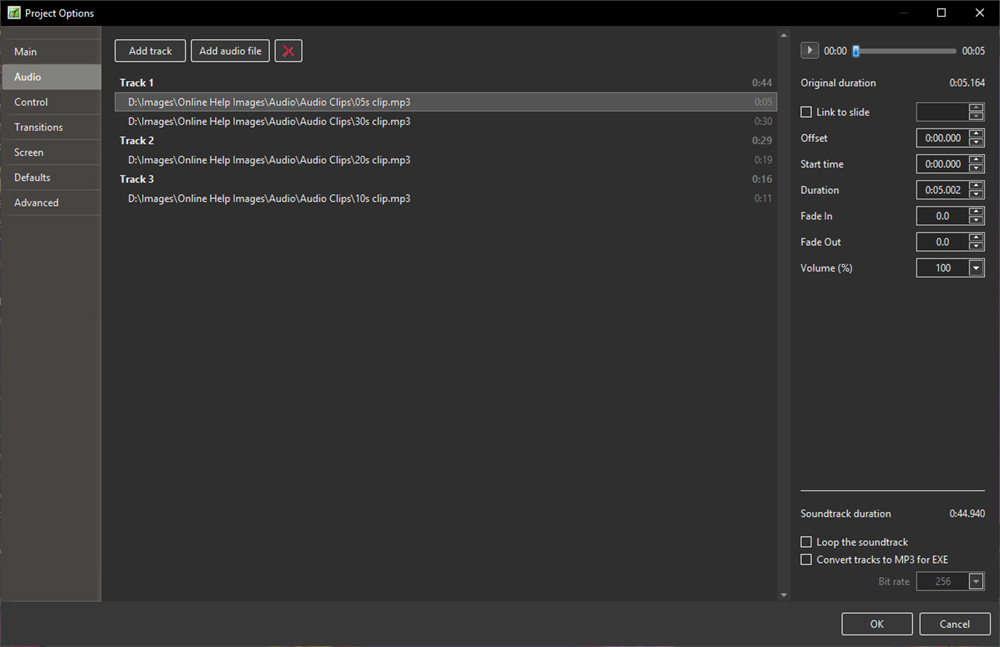
The corresponding Project Options / Audio Tab looks like this:
Note that the “Offset” value for the audio file in Track 2 in the above example is from 0 seconds on the Timeline. The “Offset” value for the second audio file in Track 1 would be calculated from the end of the first audio file in Track 1. Fade Ins and Fade Outs made via the Envelope Function are not reflected in the Project Options / Audio Tab.
Other Controls in the Timeline View
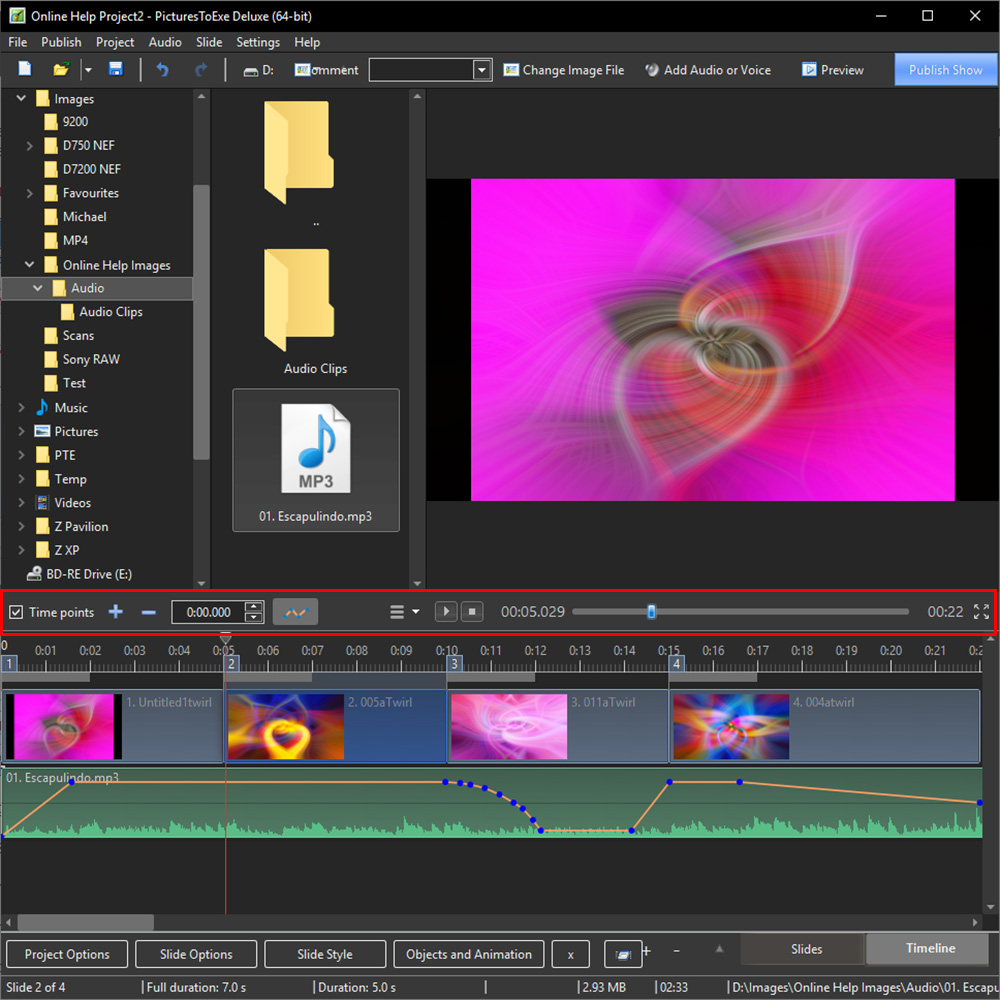
In the image above, from left to right:
- Time Points - Toggles the Slide Numbers (1,2,3 etc) on or off
- + (Plus) - Adds a Time Point at the Cursor Position
- (Minus) - Cuts the last Time Point in the Timeline to a position beyond the end of the Audio Tracks
- The time shown is the start time of the Slide under the cursor - it is possible to fine tune the start time using up and down controls or by typing in the box
- The Envelope Icon - Toggles the Envelope on or off in all tracks
Timeline Options
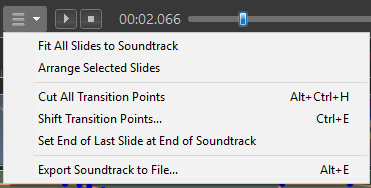
- The “triple horizontal line” (Timeline Options) Icon brings up the menu shown above
- Fit All Slides to Soundtrack - adjusts the time of each equally and fits them to the soundtrack time
- Arrange Selected Slides - select a group of slides and arrange them equally spaced
- Cut All Transition Points - moves all transition points to a point beyond the end of the soundtrack
- Shift Transition Points - select one or more slides and move their transition point(s) by a fixed amount
- Set End of Last Slide at End of Soundtrack - useful for synchronizing the end of the last slide with the soundtrack
- Export Soundtrack to File - Choose WAV, or MP3 and Bit Rate
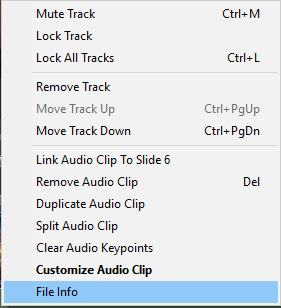
The Timeline Right Click Menu - Audio Clips
- Link Audio Clip to Slide x -
- Remove Audio Clip
- Duplicate Audio Clip- This command will duplicate the selected Audio Clip in a new Audio Track
- Split Audio Clip - This command will split the selected Audio Clip at the position of the cursor
- Clear Audio Keypoints
- Customise Audio Clip
- File Info
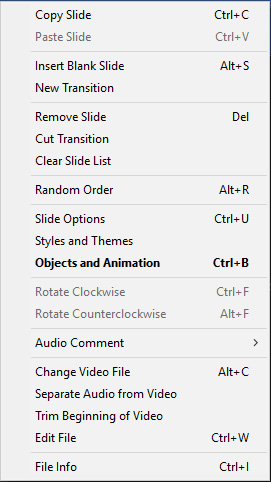
The Timeline Right Click Menu - Video Clips
- Separate Audio from Video - The Audio of a Video Clip is extracted from the Video Clip and is inserted into a New Track and can be edited as a normal Audio Track.
- The Audio which remains in the Video Clip is automatically Muted
- Trim Beginning of Video The video is trimmed to the position of the cursor. Note that the complete video clip is included in an EXE File. This option is best for MP4 output.
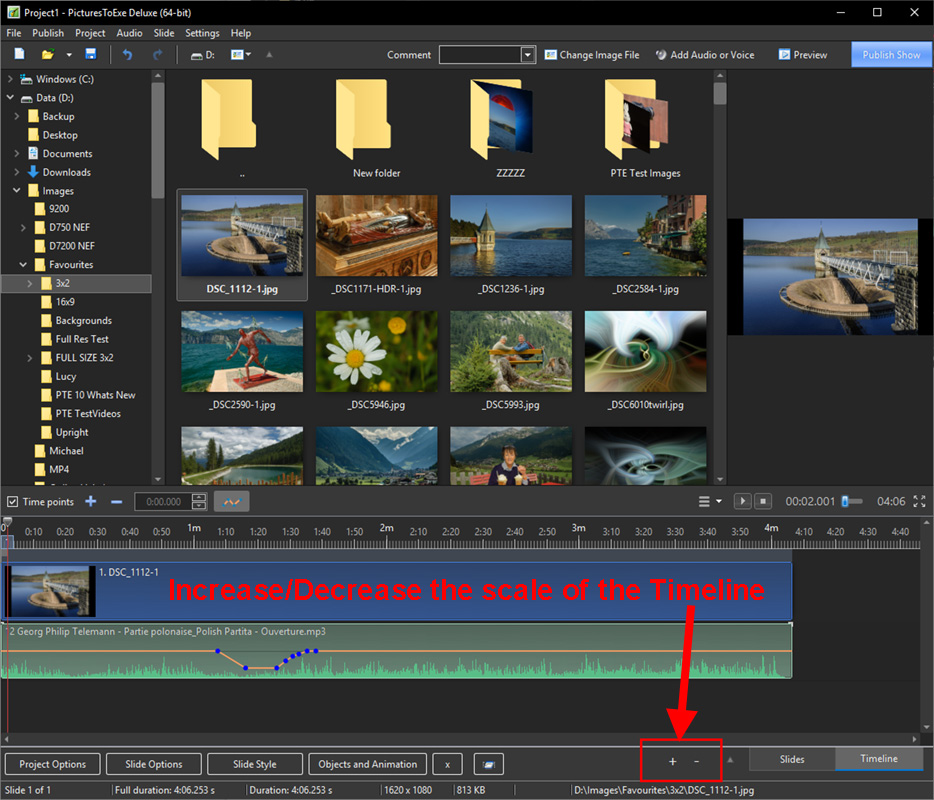
Scaling the Timeline View
The Mini Player
- The PLAY button starts the MINI-PLAYER from the Cursor Position
- The STOP Button stops the Mini-Player and returns the Cursor to the previous position
- The time shown at the end of the progress bar shows the End of the Last Slide
- The Four Arrow Icon starts the Full Screen Preview from the Cursor Position
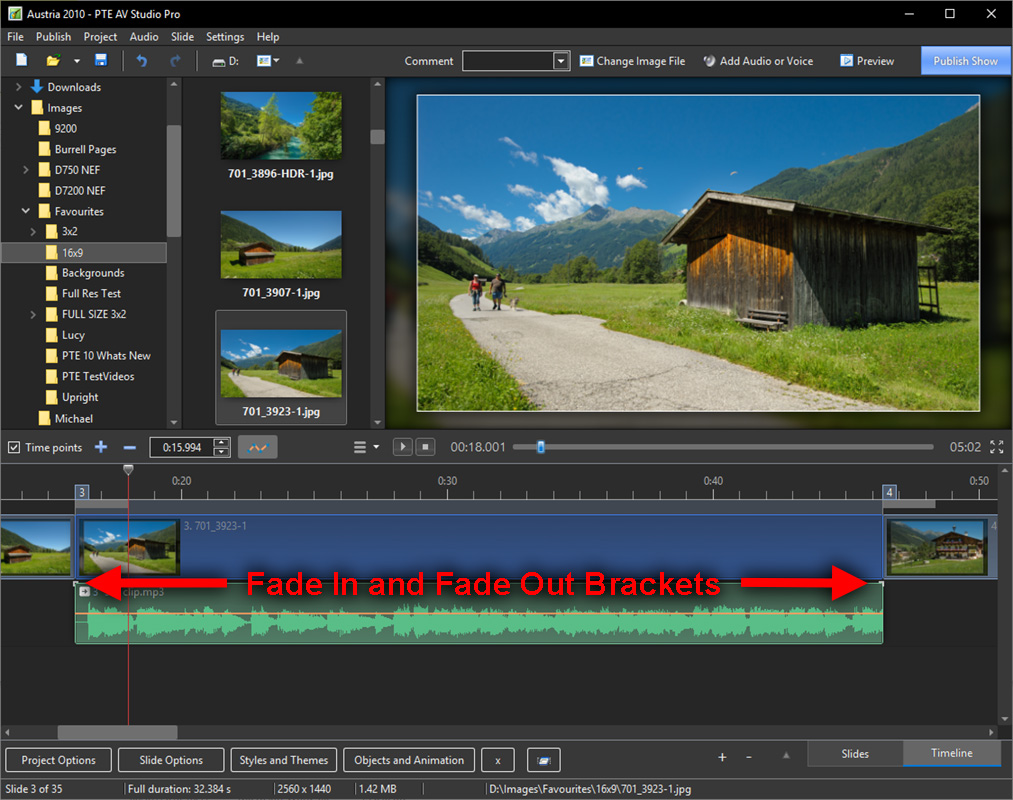
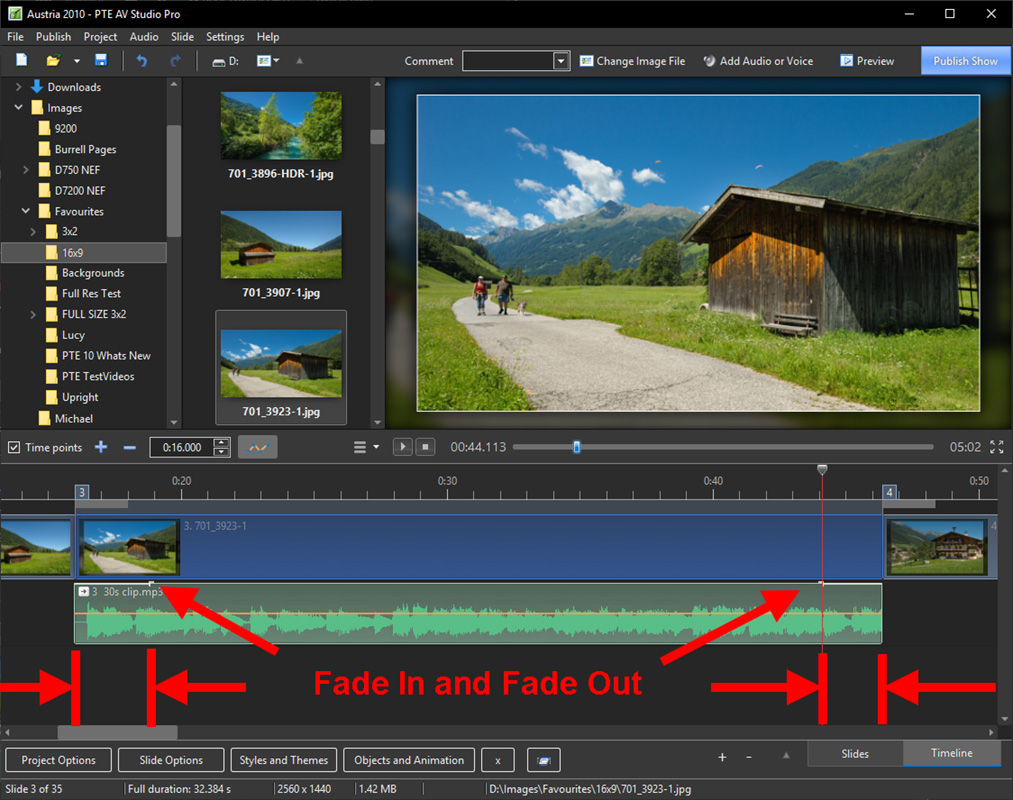
Fade In / Fade Out Brackets
- In the Timeline, an Audio Clip can be faded in or out by means of the Fade In/Out Brackets at the beginning and end of the clip.
- By dragging the bracket along the Timeline a Fade is created:
- The Fade In and Out values are reflected in Project Options / Audio
- Likewise, a Fade In or Fade Out value entered in Project Options / Audio is reflected in the position of the Fade In / Out Brackets in the Timeline
Images
- Dragging images into the Timeline View is NOT advised. This is best done in the Slide List View. The DROP point overrides the Project Options / Slide Duration default and can lead to confusion.
