Table of Contents
Framing
Framing, Cropping and the Splitter
Framing
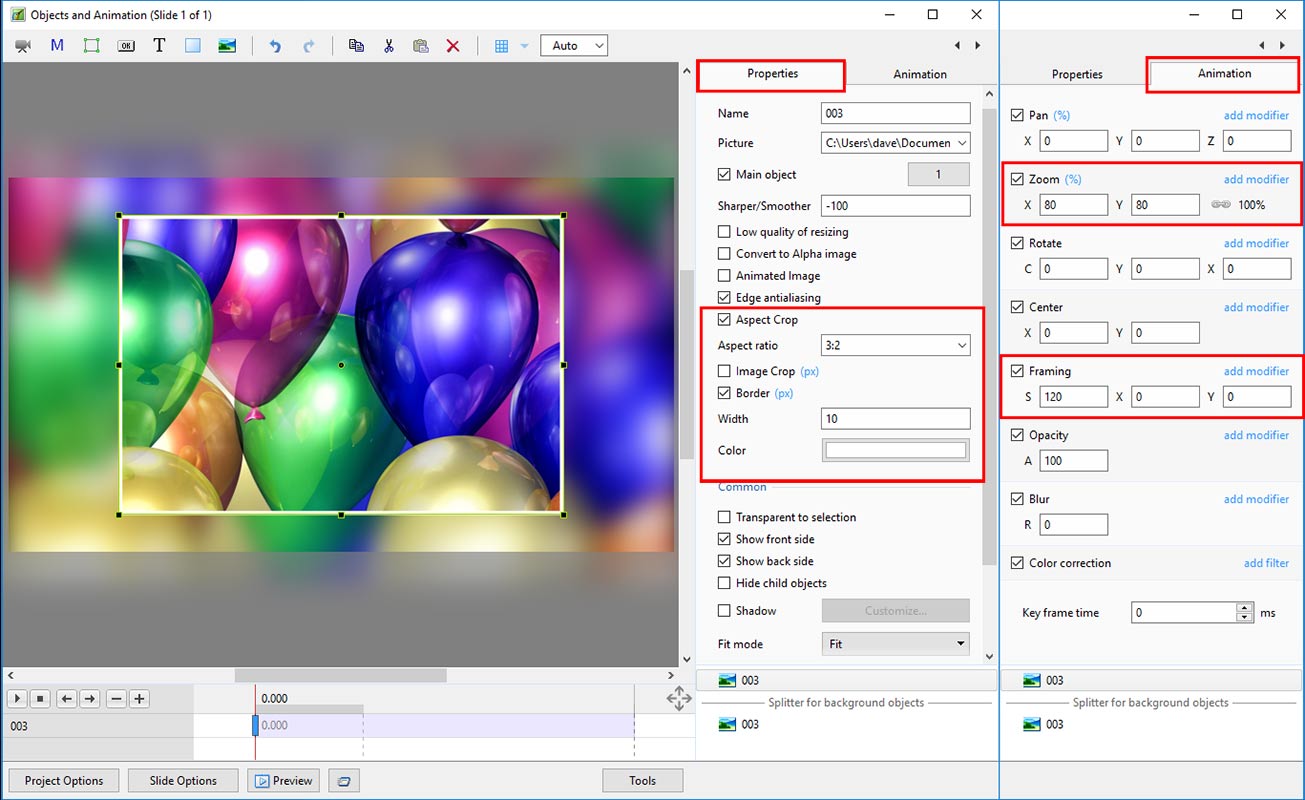
Framing is a new feature of Version 9 which allows the user to create a “Window” which can contain animation of an image within a configurable Border or Stroke Line.
In the Objects and Animation / Properties:
- Select the Width of Border (if required) using the BORDER Width Parameter (* See below)
In Objects and Animation / Animation Tab:
- Adjust the S (Scale) Control to set the required magnification of the Image
- Adjust the X and Y (Offset) Controls to set the required framing/composition of the Image
- Adjust the ZOOM Control to set the required size of the Window
- The Zoom, Scale and Offset X and Y can be set to animate both the Image and the Window between Key Frames
Further refinements:
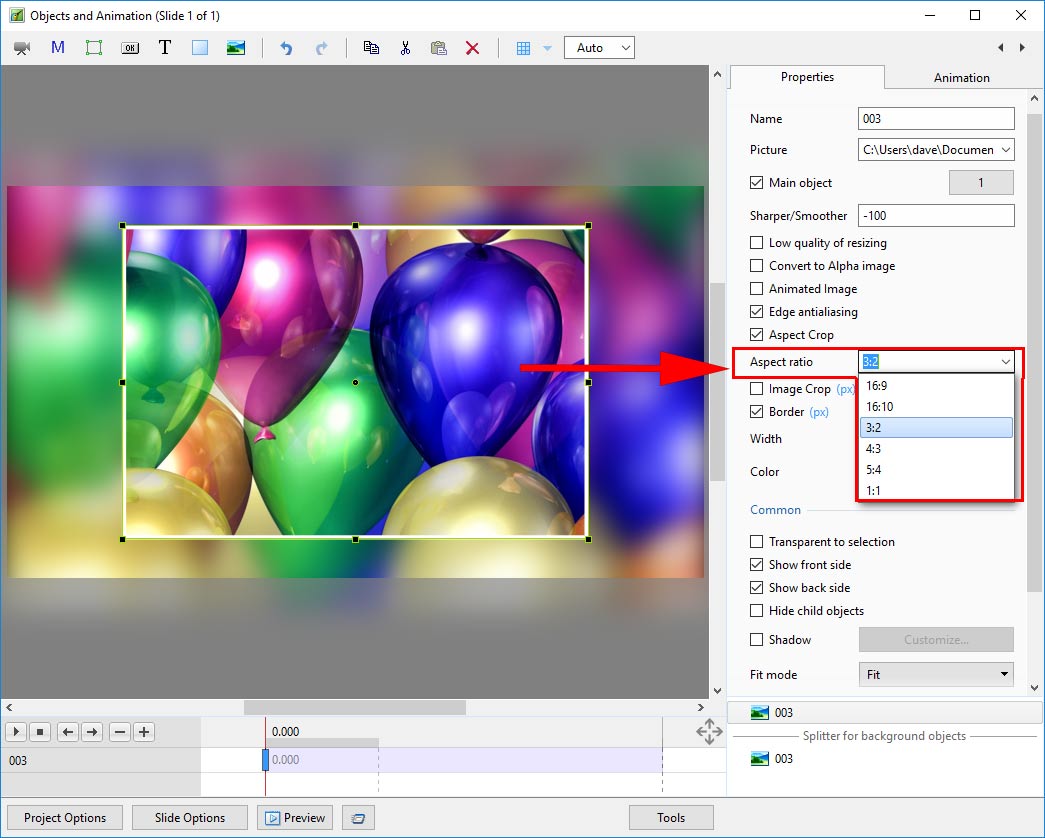
- The Aspect Ratio Crop Tool can be used to create a fixed ratio crop from the dropdown menu
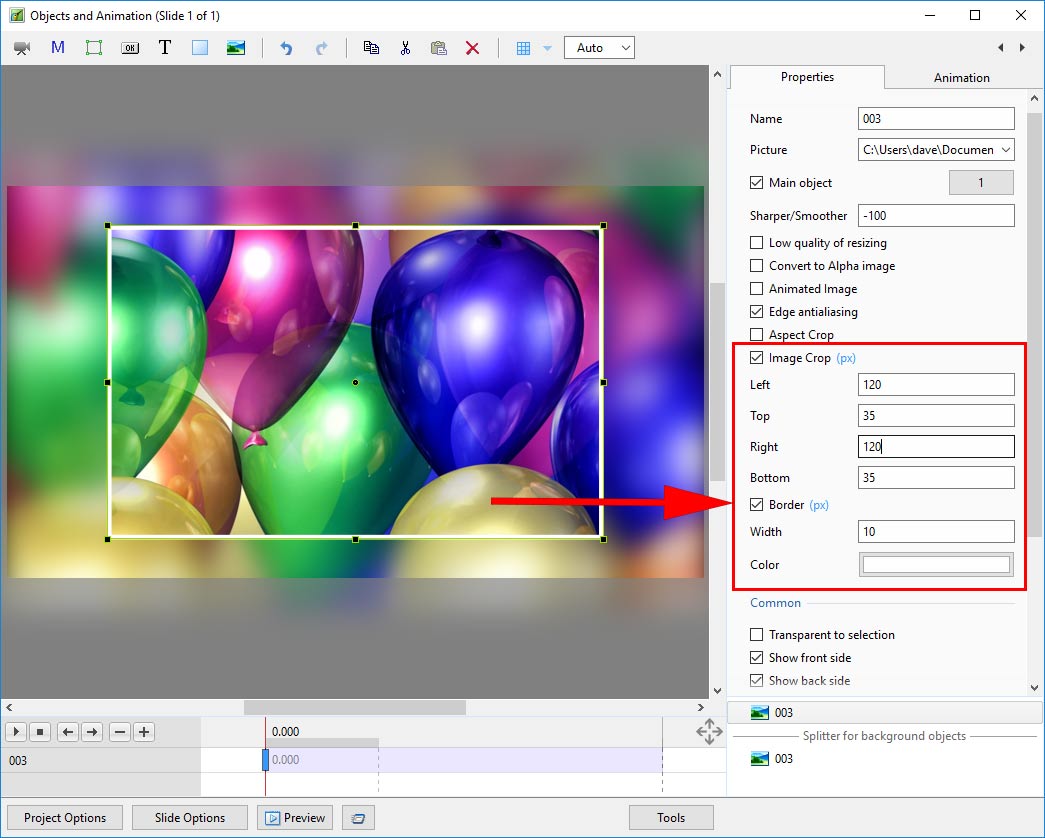
- The Image Crop Tool can also be used to create a non-standard Aspect ratio
- Add a Shadow to the Window in Objects and Animation Properties
- Add a copy of the Main Image below the “Splitter for Background Objects” in Objects & Animation and Blur; Desaturate or otherwise modify using the Objects and Animations Controls
- OR
- Add a pre-prepared copy of the Main Image (Blurred; Desaturated or otherwise modified) to the Background in Slide Options
N.B. At the time of writing it is possible to make changes to the Framing X and Y values which will not have any effect on the image UNTIL either Aspect Ratio Crop or Scale values have been changed
The Splitter for Background Objects
- The “Splitter for Background Objects” is a device which separates the Main Objects from the “Background” Image(s)
- Right click in the Objects Panel
- Choose Splitter for Background Objects
- Right click on the Splitter for Background Objects and Add Image(s)
- Everything below the “Splitter for Background Objects” is then regarded as “Background” when “Use Background from slide” and “Transparent background of Slides” are turned on in a Custom Transition
Aspect Ratio Crop
- Select the required Aspect Ratio from the dropdown menu
- Framing (Scale, X and Y) can now be applied to the Aspect Ratio Crop in the Animation Tab
Image Crop
- Select Percentage or Pixels
- Framing (Scale, X and Y) can now be applied to the Image Crop in the Animation Tab
Border
- Select Percentage or Pixels
- The thickness of the border can be set as Pixels but is stored as a Percentage of the original Pixel Dimensions of the Object
- If the Object has a smaller or greater pixel dimension than its parent i.e. Frame or Background and the object is “FIT” to the Frame or Background then the “apparent” thickness is going to look different to that of an Object whose pixel dimensions are the same as its parent.
Basic Demo
You can view full screen by using the Vimeo Control.
en-us/11.0/how_to_v9/framing.txt · Last modified: by admin236548


