Table of Contents
Objects & Animation Editor
O&A Editor
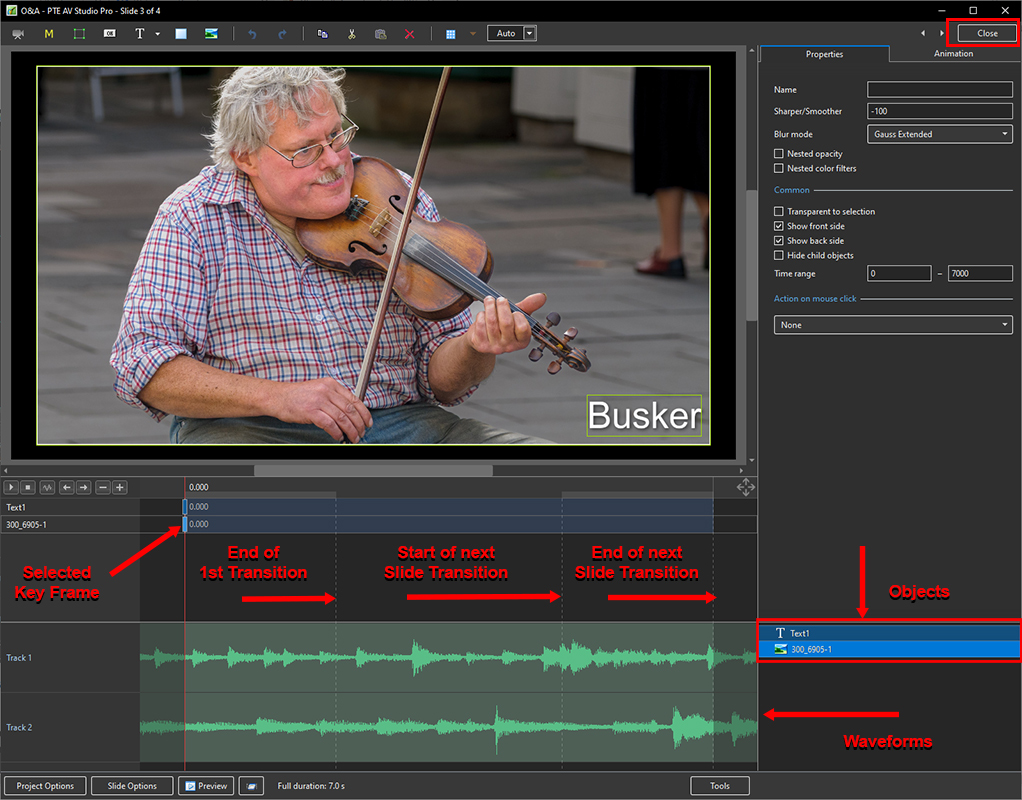
- The Objects and Animation Editor is shown below.
- The various elements of the window are identified.
- There are two tabs for controlling actions in the Editor, “Properties” and “Animation”.
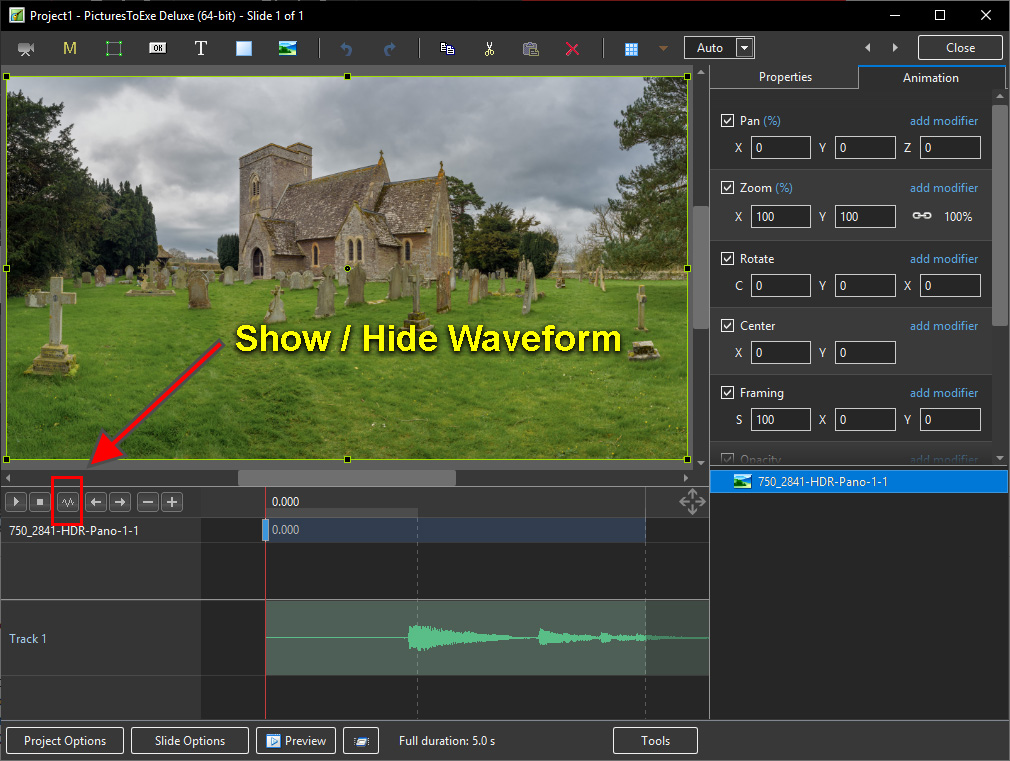
- Waveforms are shown in the O&A to aid synchronisation of Slides and Music/Commentary
- The “Close” Button Returns to the Main Window.
Drag and Drop Objects
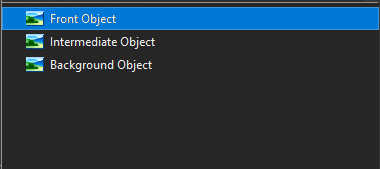
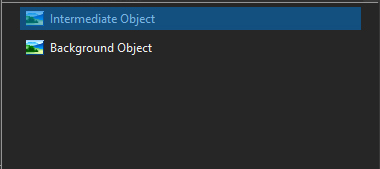
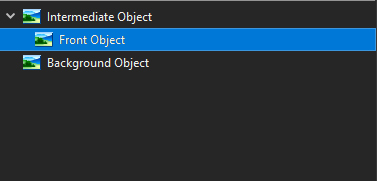
- It is possible to change the order of Objects in Objects and Animation by dragging and dropping
- Click on an Object to highlight it
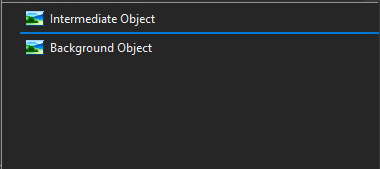
- Drag to a new position between two other Objects
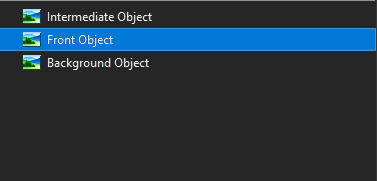
- OR drag on top of another Object to create a Parent / Child relationship
Show / Hide Waveform
The Tools Menu
- Click on Tools and Waveform to display the Waveform options
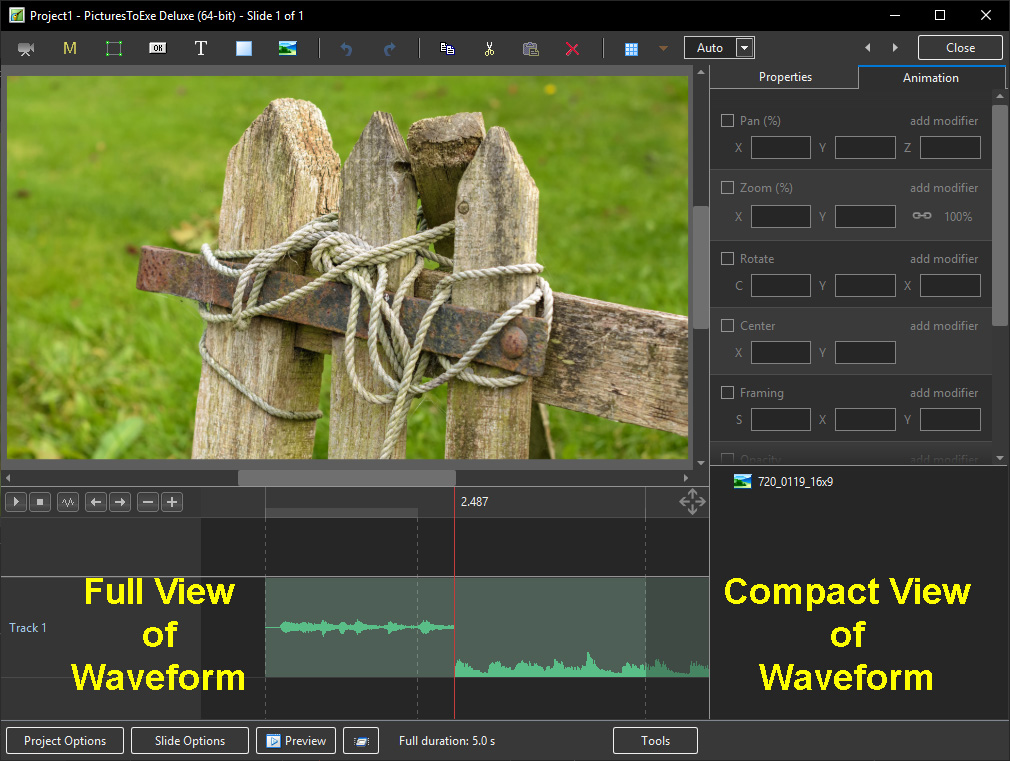
- The height of the Waveform can be selected between 100% and 400%
- The Full View of the Waveform is shown when the appropriate box is ticked
- The Compact View of the Waveform is shown when the box is un-ticked
- Clicking on Show Waveform (Hotkey Ctrl+T) toggles the Waveform display on or off
The Grid
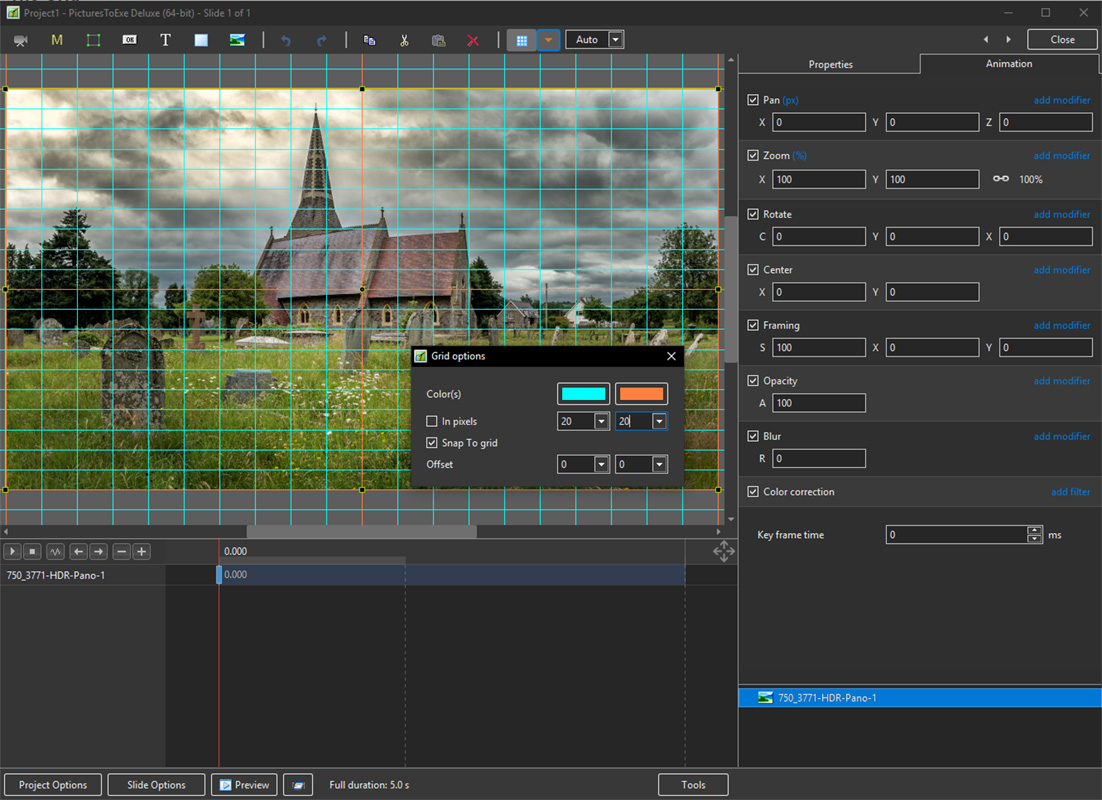
- Click on the Grid Icon to apply the Grid (Ctrl + G)
- Click on the down arrow to show the Grid Options
- Select the colours of the Minor and Major Grid Lines
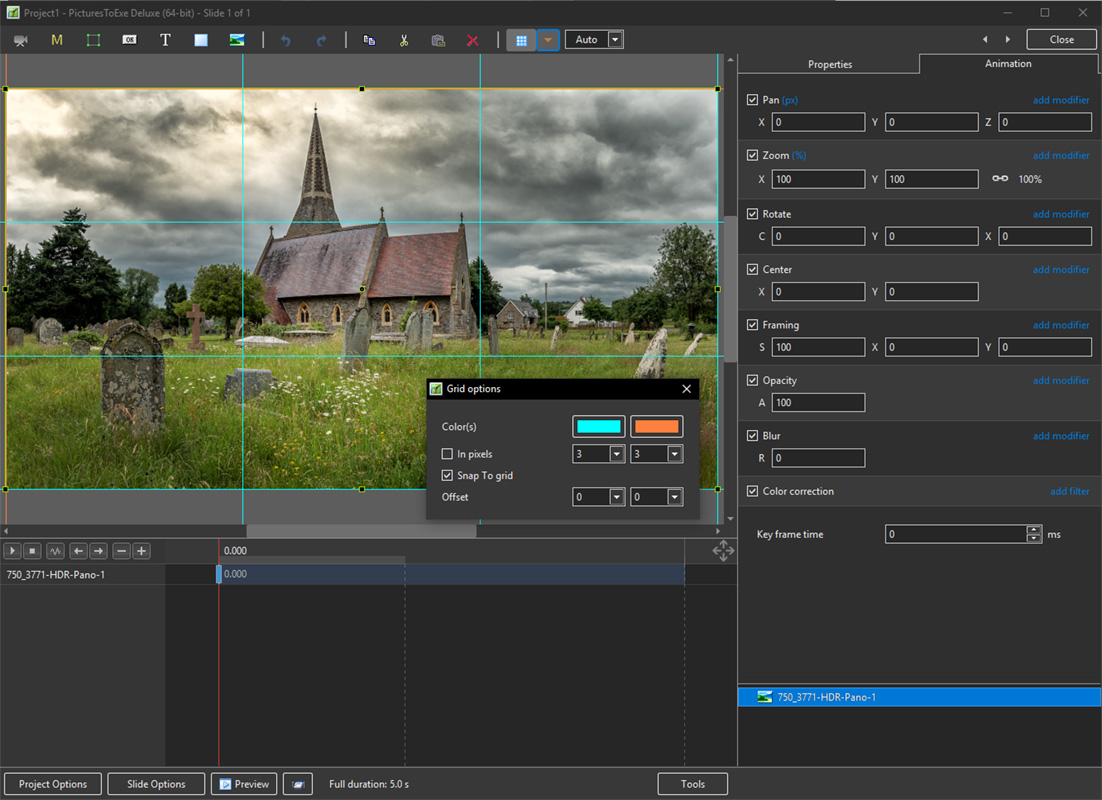
- Select “In Pixels” or in number of divisions per image
- There are 10 minor divisions between Major Grid Lines in the X and Y directions
- Select “Snap to Grid” on or off
- Select “offset” in X and Y directions
- In Pixels Mode the size and AR of the grids are set by entering a fixed pixel dimension
- The Grid is therefore made up of squares
- With “In Pixels” turned off the size and Aspect Ratio of the grid is determined by the numbers set
- In the first example above the Grid has been “Centred” by setting a 20×20 Grid
- The second example shows a “Rule of Thirds” Grid
- With “Snap To Grid” ticked the Image/Object will snap to a Major or Minor Grid Line in either direction if dragged close enough
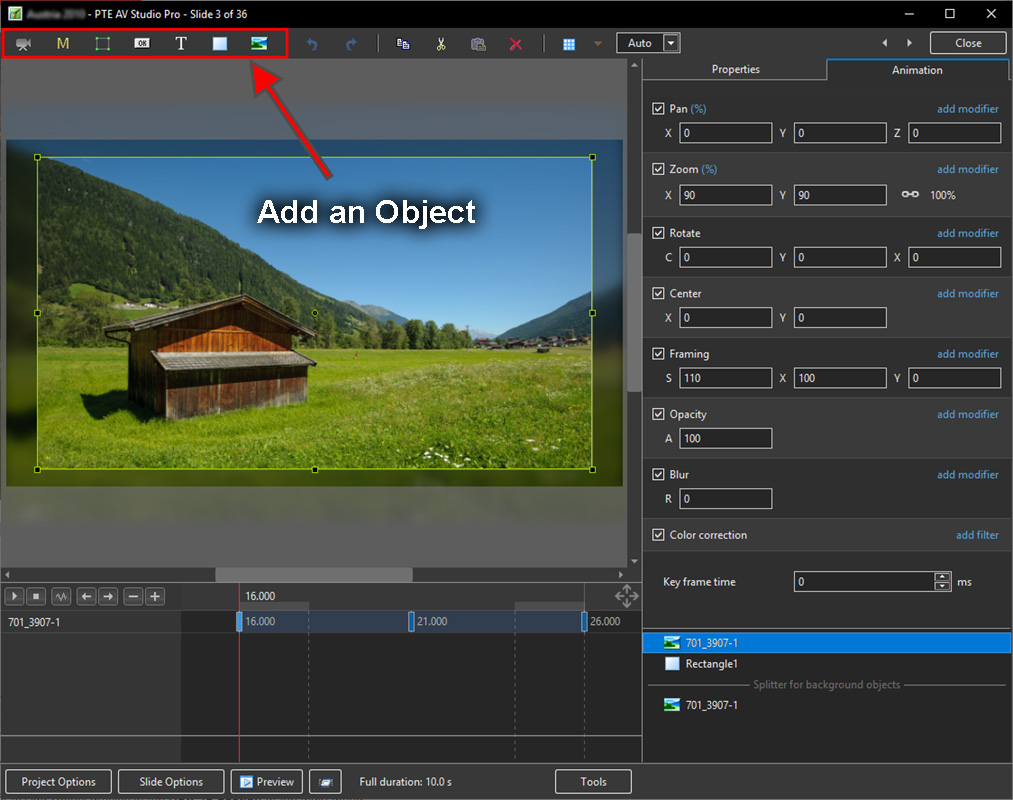
Add an Object
- Add a Video, Mask, Frame, Button, Text, Rectangle or Image Object
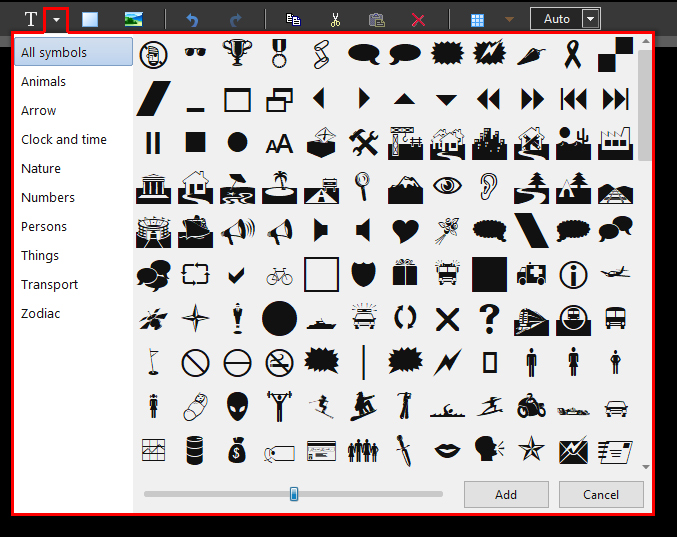
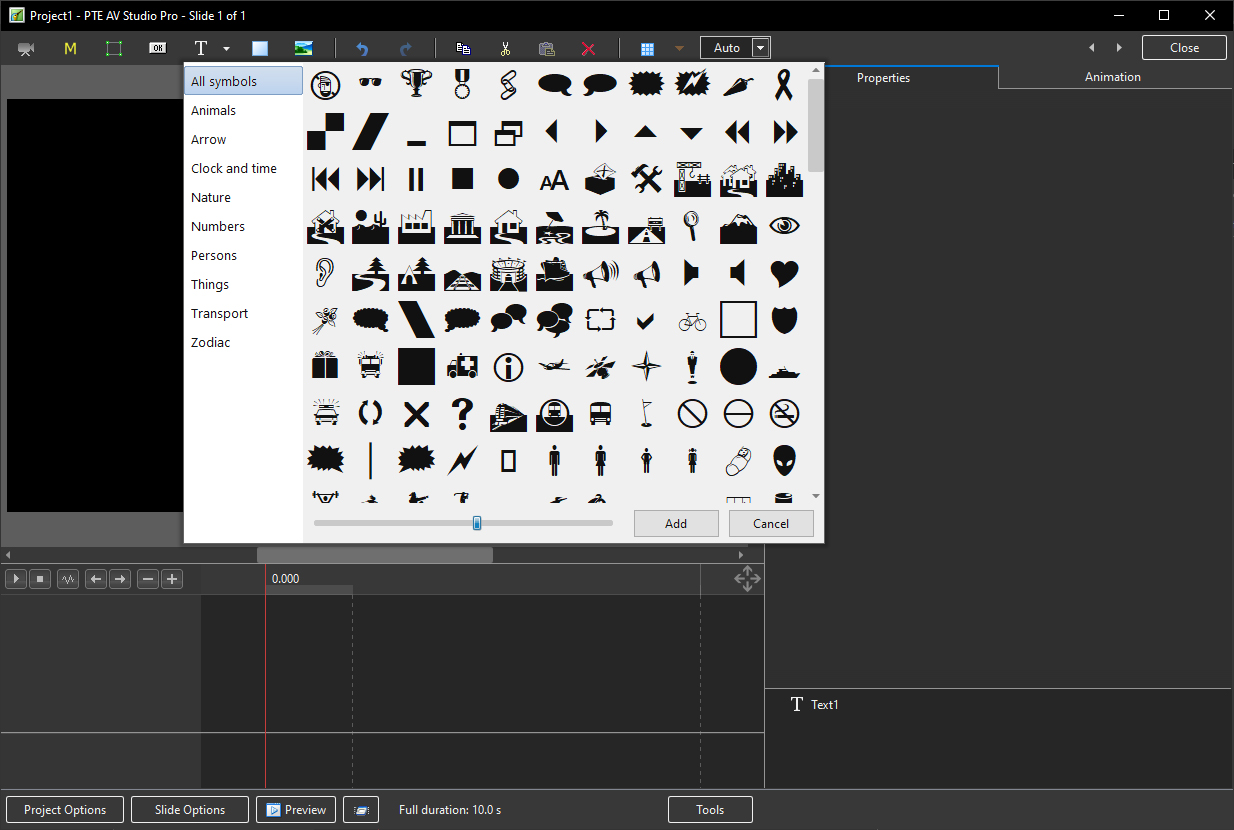
- Add a Symbol/Vector Image:
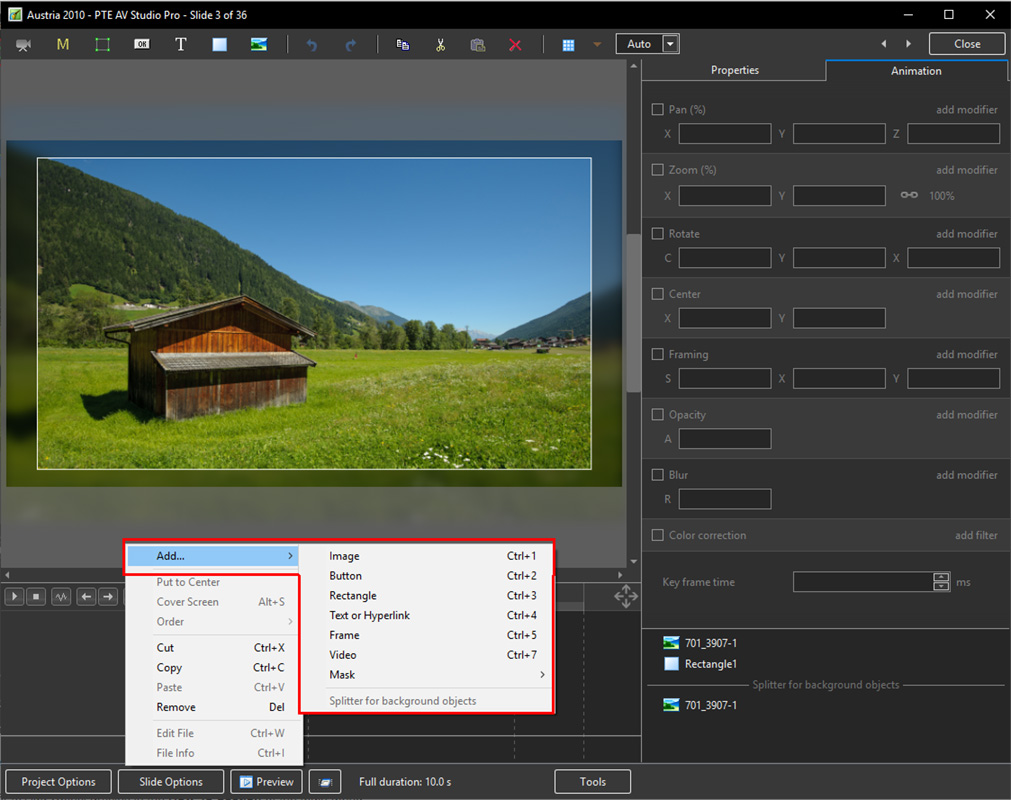
- Alternatively via the right click menu:
- Please refer to Add Object articles in the How To Section of the Main Menu
Customise Buttons
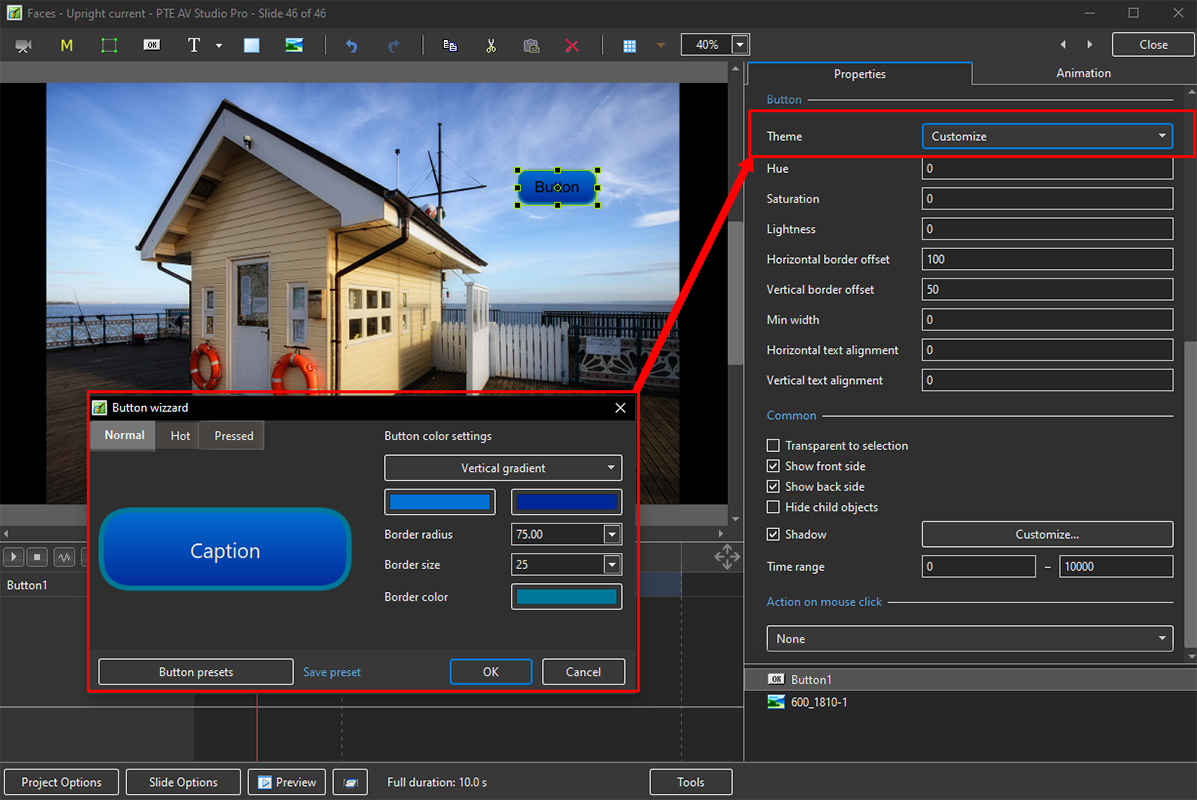
- In Objects & Animation, with the Button selected, click on “Theme” in the Button Properties
- In the “Button Wizard”:
- You can select different Themes for Normal, Hot (Hover Mouse) and Pressed (click with Mouse)
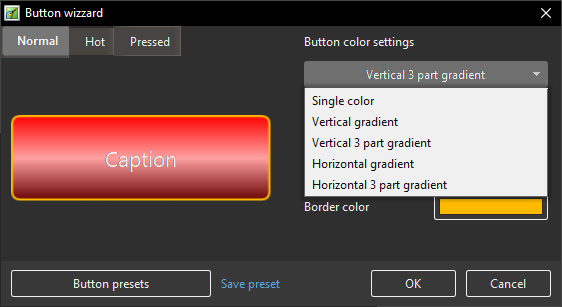
- Select Solid Colour or Gradient Type:
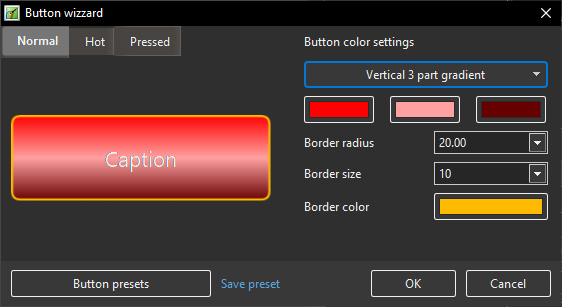
- You can choose the Colours, Border Radius, Border Size and Border Colour
- You can choose from a list of Presets and create your own Preset
Tools Menu
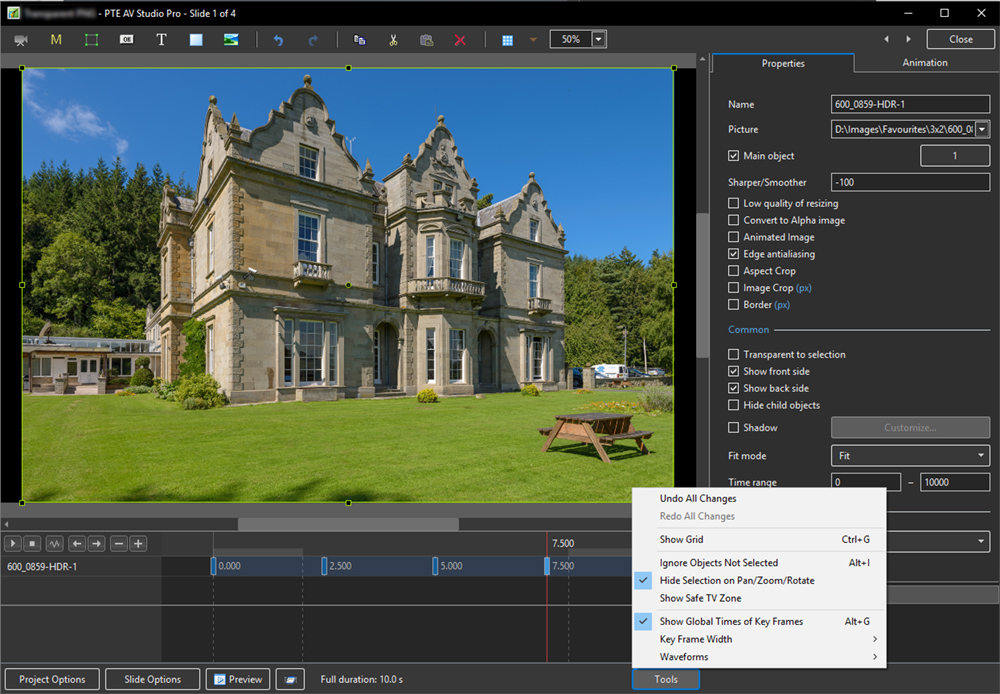
- Options in the O&A Tools Menu:
- Undo all changes in the O&A Window for the Current (O&A) Session
- Redo all Changes - reverses the action of the Undo All Changes command
- Show Grid (Ctrl+G) - Toggles the Grid on or off - See “The Grid” above for settings
- Ignore Objects not selected (Ctrl+I) - Allows mouse selection of Objects behind other objects which are not selected
- Hide selection on Pan/Zoom/Rotate - the green frame around an Object is hidden during a dragging or resizing operation using the mouse
- Show Safe TV Zone
- Show Global Times of Key Frames
- Key Frame Width - Adjust Key Frame width from 100% - 300%
- Waveforms - Adjust the height of a waveform in the O&A Screen from 100% - 400%
Text Animations
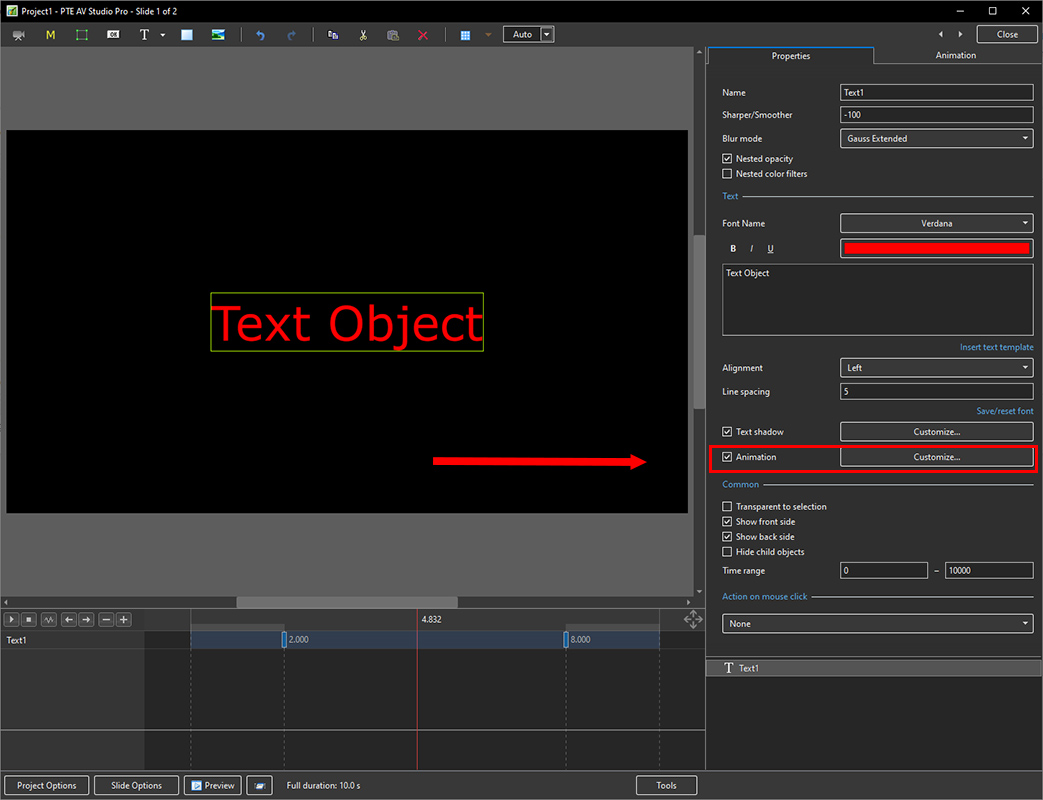
- Add a text object and click on Animation
- Click on Customize
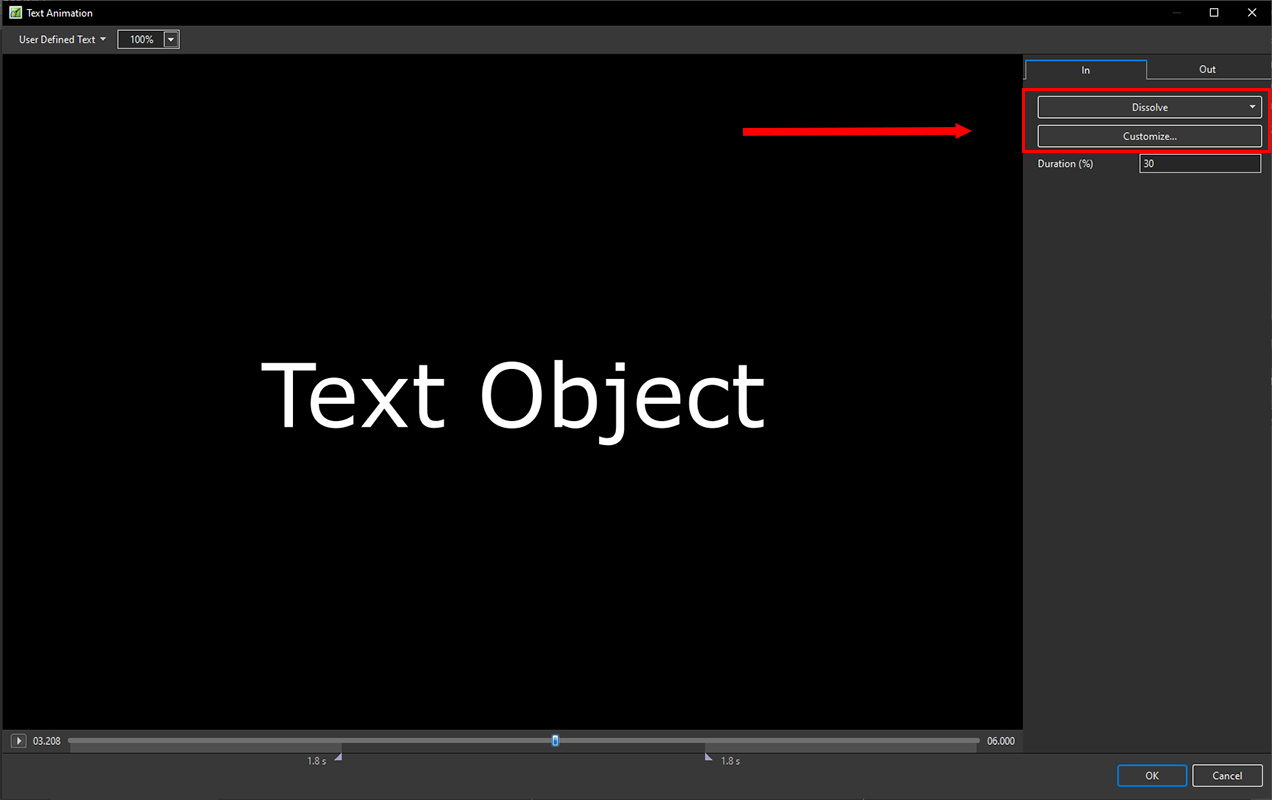
- Move the Cursor or press the Play Button to see the default effect for the “In” and “Out” Animations
- Click on “Dissolve” to see the available Preset Animations
- “Duration” shows the percentage of available time for the effect
- Click on “Customize”
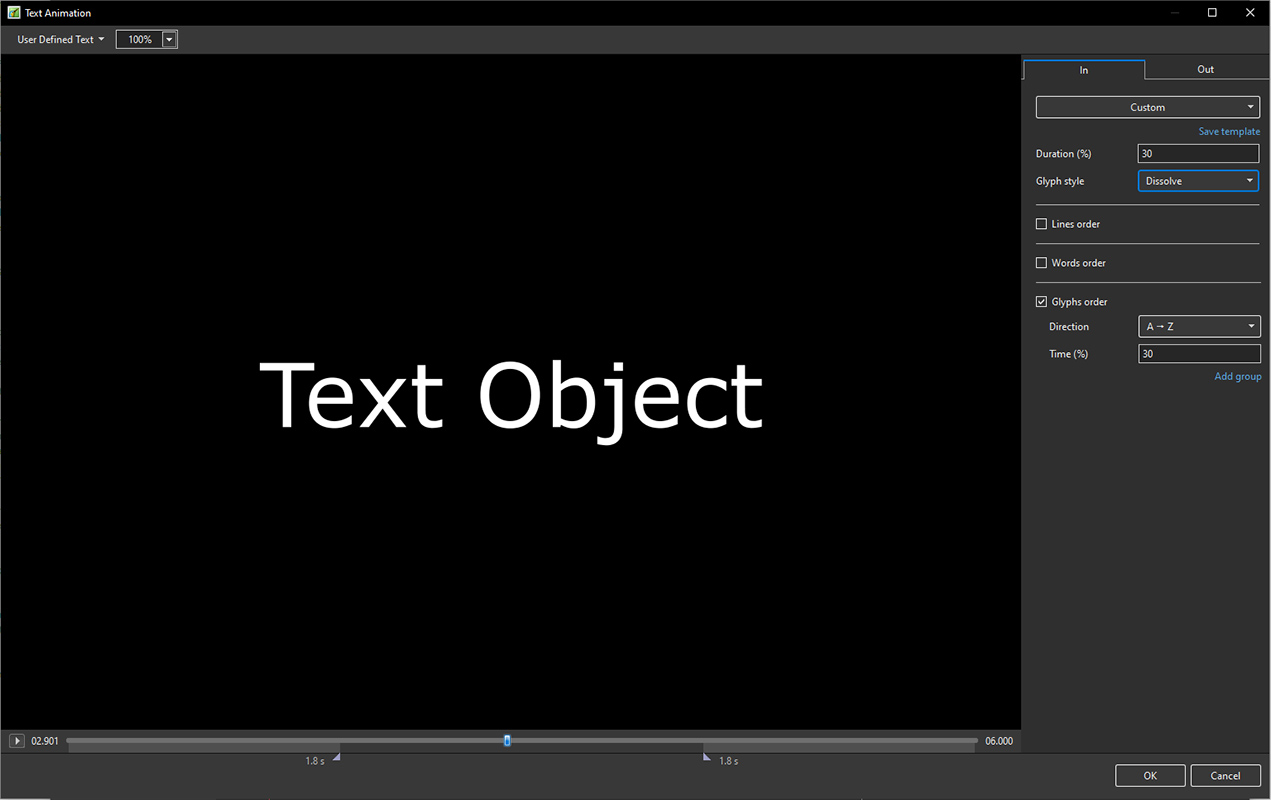
- Move the Cursor or press the Play Button to see the default effect for the “In” and “Out” Animations
- “Duration” shows the percentage of available time for the effect
- “Glyph Style” - select from Presets in dropdown menu
- Select from “Glyphs Order”, “Lines Order” or “Words Order”
- “Direction” - select preset from dropdown menu
- “Time (%)” - Varies the Intensity of the effect
- Click on “Out” tab
- The options are similar to the “In” Tab
- “User Defined Text” - Click on the text “User Defined Text” to see a dropdown menu with some options - “User Defines Text”, Sample Text 1, Sample Text 2 and Sample Text 3
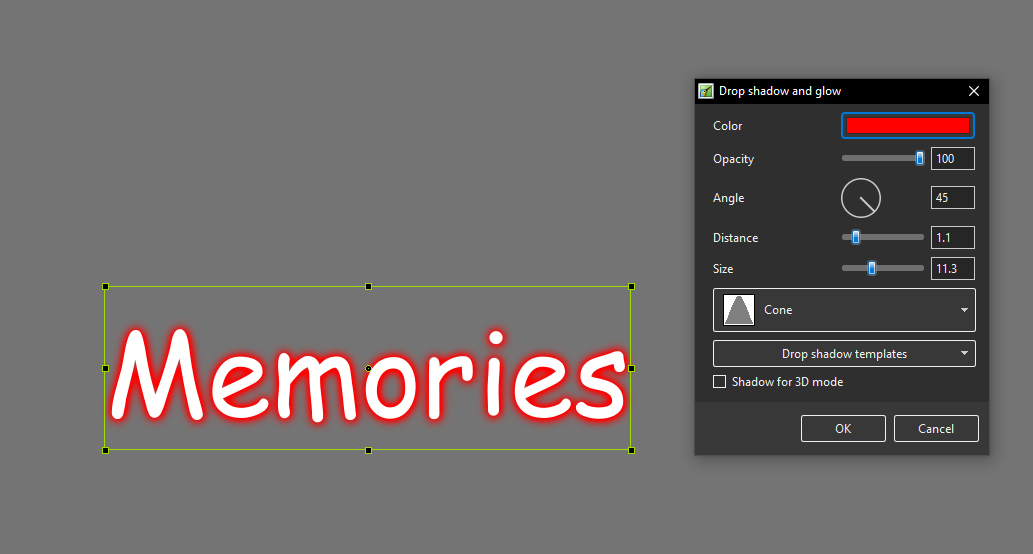
Outlining Text
Add a Symbol (Vector Icon)
- Symbols can be scaled to any size without loss in quality
- The Colour of a Symbol can be changed
- The Shadow of a Symbol can be adjusted
- The Shadow of a Symbol can be adjusted
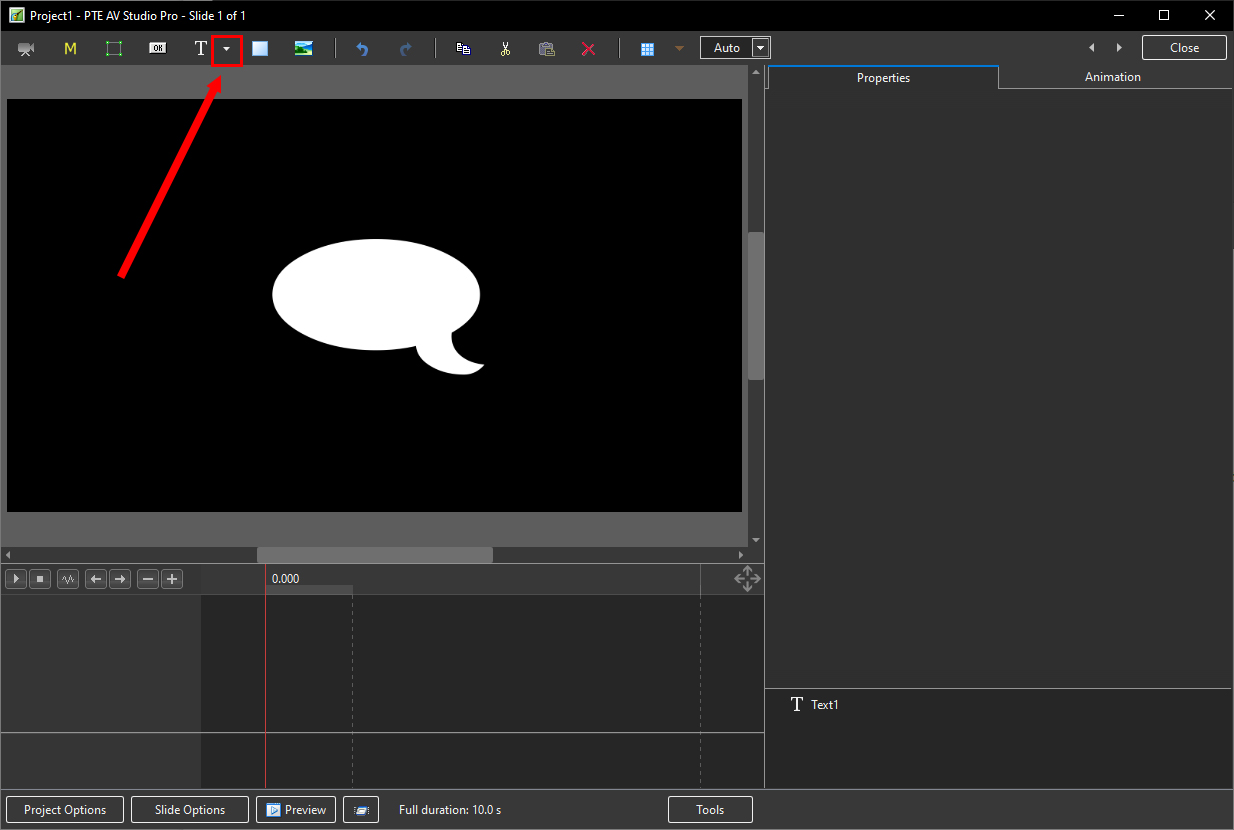
- In the Objects and Animation Editor Right click in a blank space and choose “Add > Symbol” (Ctrl 8) or click on the Icon next to the “T” for a dropdown Menu
en-us/11.0/objectsandanimation_1/main_window.txt · Last modified: by davegee
