Table of Contents
Handling Audio Files
* By clicking on an Audio File it can be dragged along the horizontal axis of the Timeline to a new position. Shift+Clicking on an Audio File will prevent movement between tracks.
- By clicking on an Audio File it can be moved vertically from its existing track to a different track.
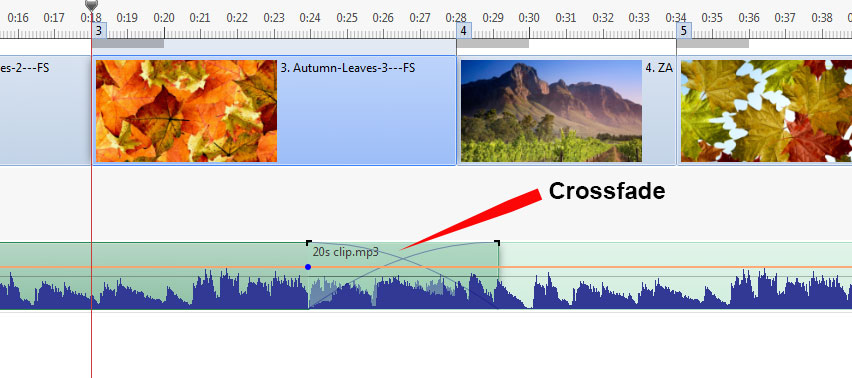
- “Overlapping” Audio Files in the same track will create an automatic Crossfade between the two Audio Files.
- The duration of the Fade Out and Fade In will be determined by the overlap time.
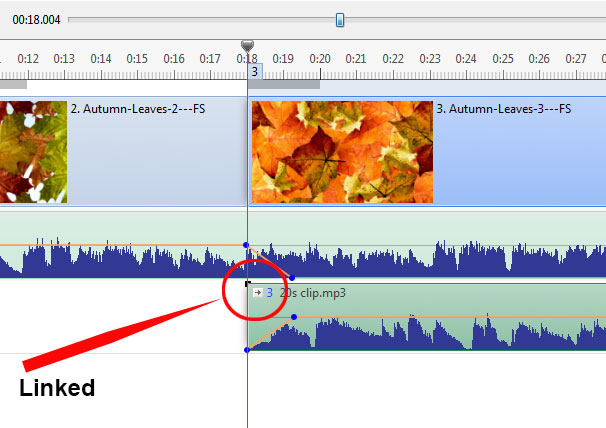
- Audio Files can be Linked to specific Slides. Linked Audio Files are best placed in the designated “Track for Audio Comments” - (See Project Options/Audio Tab). The position of the Cursor (red line) determines the Slide to which the Audio File can be linked. (Note that the setting for “Synchronize soundtrack and slides” in Project Options / Advanced should be On or Ticked).
- Clicking on an Audio File and dragging it upwards until a Red Cross appears will delete the file.
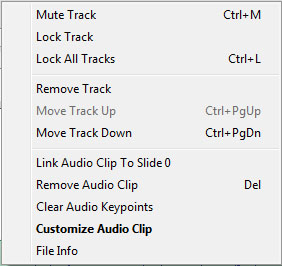
- Right clicking on an Audio Track brings up the following menu items:
- Mute Track (Ctrl+M) - Mutes the audio of the selected track.
- Lock Track - Prevents movement of the track
- Lock all tracks (Ctrl+L) - Prevents accidental movement of all tracks. Can be overridden (for slides) by clicking on numbered tab and dragging.
- Remove track - Deletes the selected track
- Move Track Up (Ctrl+PgUp) - Moves the selected track up by one step
- Move Track Down (Ctrl+PgDn)- Moves the selected track down by one step
- Link Audio Clip….. - Links the selected Audio File to the Slide marked by the cursor (one Audio Clip per Slide per track)
- Remove Audio Clip (Del) - Deletes the Audio File
- Clear Audio Keypoints - Removes all Keypoints in the selected track
- Customize Audio Clip - Activates the Project Options/Audio Tab
- File Info - Information about the selected Audio File
The Envelope
Not available in the Essentials Edition
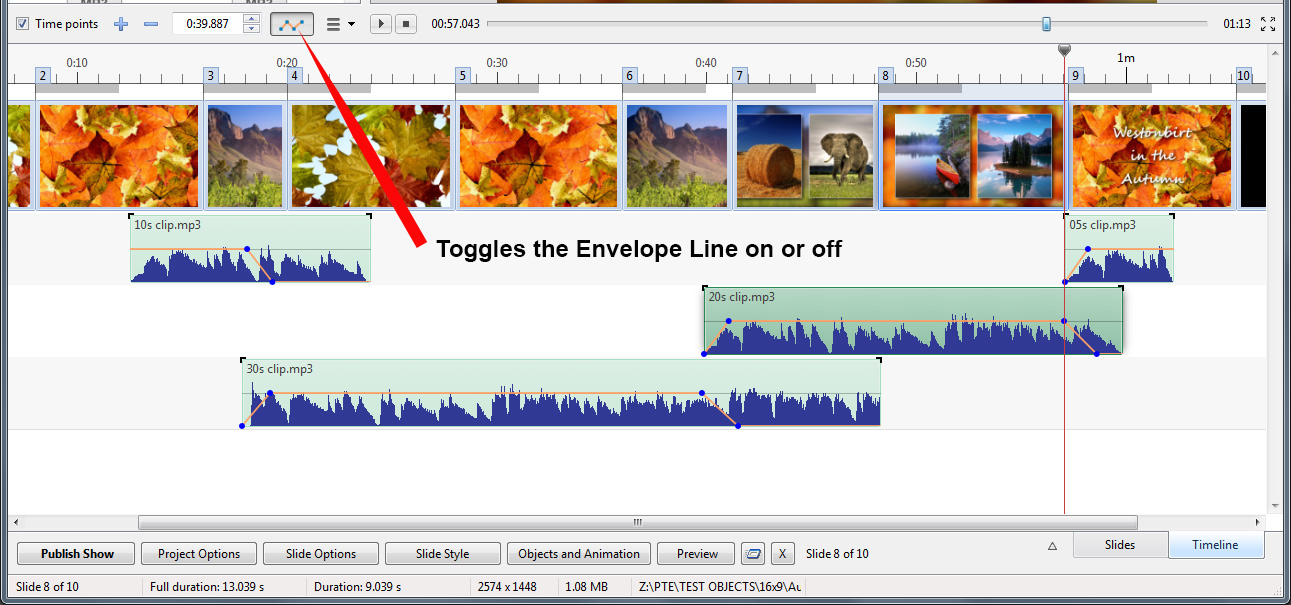
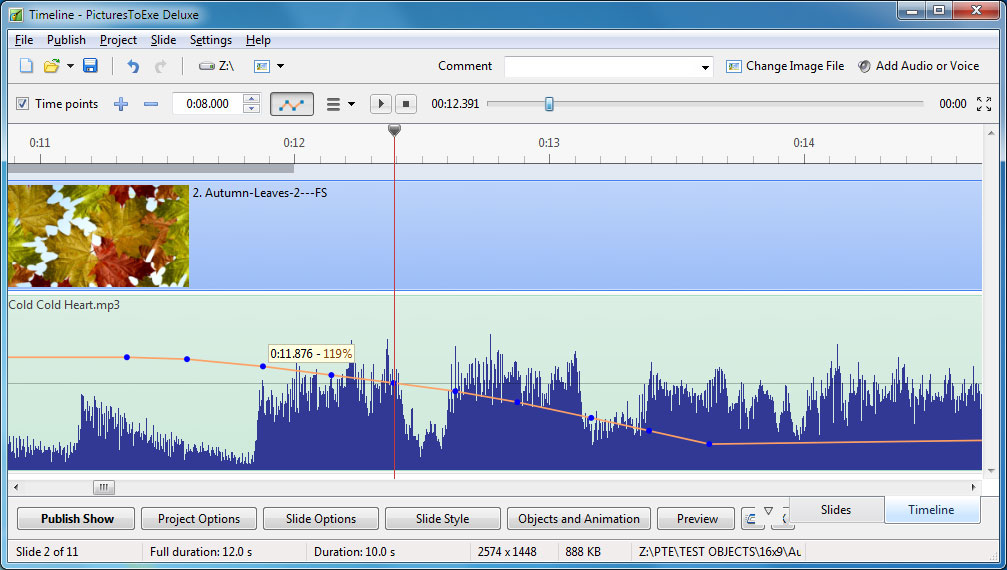
The Envelope Line is activated by clicking on the Envelope Icon as shown:
- The Colors of the Envelope Line, Waveform, Keypoint and Shading can be selected in the Timeline Tab of Settings / Preferences.
- It is also possible to change the Waveform from “Mixed Channels” to “Compact View of Mixed Channels” in the Timeline Tab.
Keypoints
Not available in the Essentials Edition
- Clicking on the Envelope Line creates a Keypoint at that position. The resulting Keypoint can be moved along the Envelope Line for positioning its time and moved up or down to raise or lower the volume at that point. To create a Fade add two Keypoints and adjust the volume between them. See the example above.
- Hovering the mouse over a Keypoint will show the Time and Volume values at that position. The Volume can be represented in percentage or in decibels and can be changed in the Timeline Tab of Settings / Preferences.
- Right Clicking on a Keypoint deletes the Keypoint.
- By using a combination of Ctrl+Mouse Wheel to adjust the Width of a track (Zoom) and the Track Height adjustment in the Timeline Tab of Preferences to maximise the view, it is possible to fine tune the positioning of Keypoints accurately. Ctrl+Shift+Mouse Wheel will also adjust Track Height.
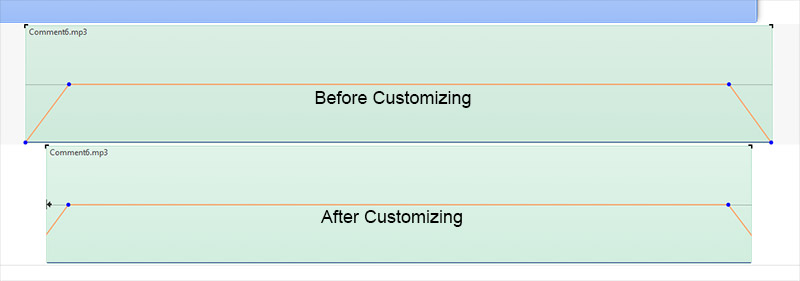
- Please note that if an Audio Clip having Key Points at the extremes (beginning or end) is customized by having its Duration altered (Start Time and/or Duration) either in the Project Options/Audio Tab or by dragging in the Timeline, it is possible that these Key Points will no longer be seen but will still be active. This might result in an unexpected sound level effect.
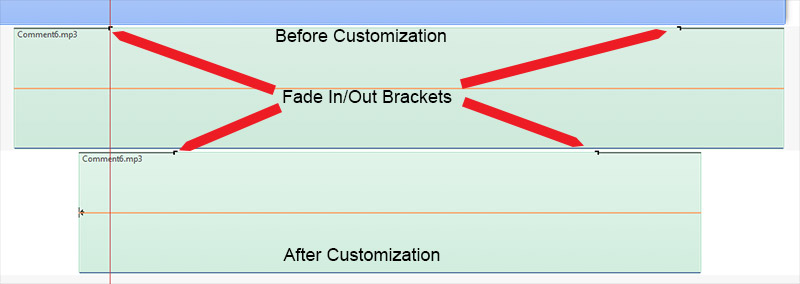
- The Fade In and Fade Out Brackets in the Timeline are not affected in the same way. The settings of the Fade In Bracket and Fade Out Bracket are reflected in the Project Options/Audio Fade settings for the Audio Clip
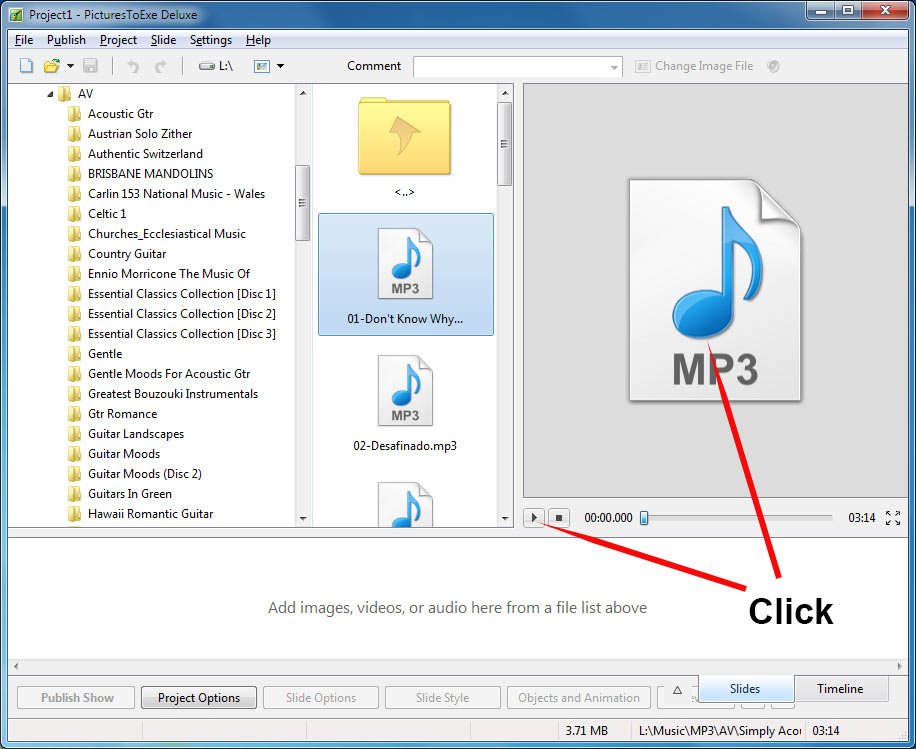
Preview Audio Files
en-us/9.0/main-window_1/audio_files.txt · Last modified: by 127.0.0.1
