Table of Contents
Ken Burns Effect
From WikiPedia:
- “The Ken Burns effect is a type of panning and zooming effect used in video production from still imagery. The name derives from extensive use of the technique by American documentarian Ken Burns. The technique predates his use of it, but his name has become associated with the effect……. The feature enables a widely used technique of embedding still photographs in motion pictures, displayed with slow zooming and panning effects, and fading transitions between frames”.
See Demo Video at the bottom of this page.
The Method
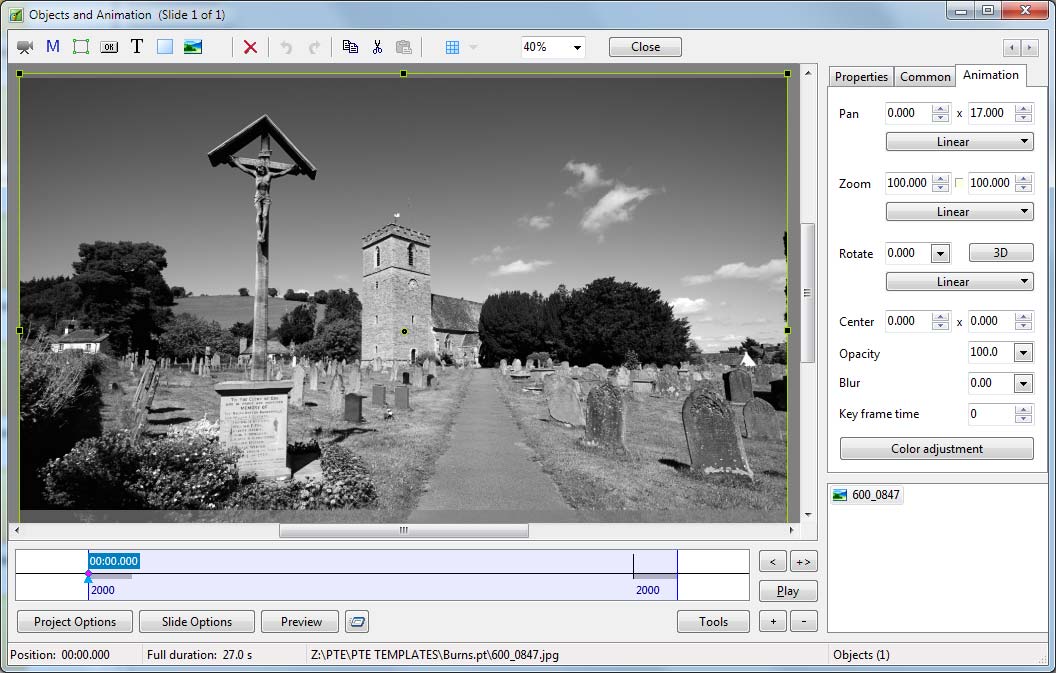
- Add an image to a slide - Full slide duration in this case is 27 seconds
- Ensure that it is of sufficiently high resolution to cope with any deep zooms in the slide
- Example - If the deepest Zoom on a 1920×1080 image in a 1920×1080 slide is 200% the resolution of the image needs to be 3840×2160
First Zoom
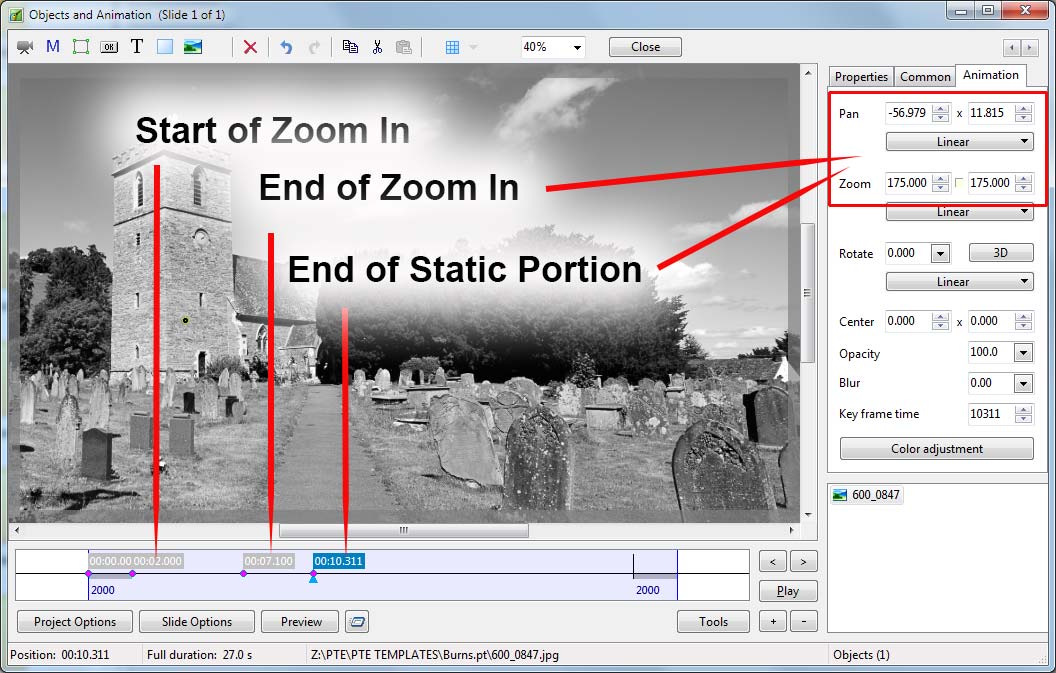
- Key Frames now need to be added to mark:
- The Start of the first Zoom-In
- The End of the first Zoom-In
- The End of the Static Portion
- Right Click on the First Key Frame and select “Clone Key Frame”
- Place at (drag to) the position of the Start of the Zoom-In e.g. the end of the Slide Transition
- Clone this (new) Key Frame and place at the approximate position of the End of the Zoom-In
- Apply the desired amounts of Zoom and Pan to the Image as shown
- Clone the “End of Zoom-In” Key Frame and place at the approximate position of the “End of the Static Portion”
First Pan
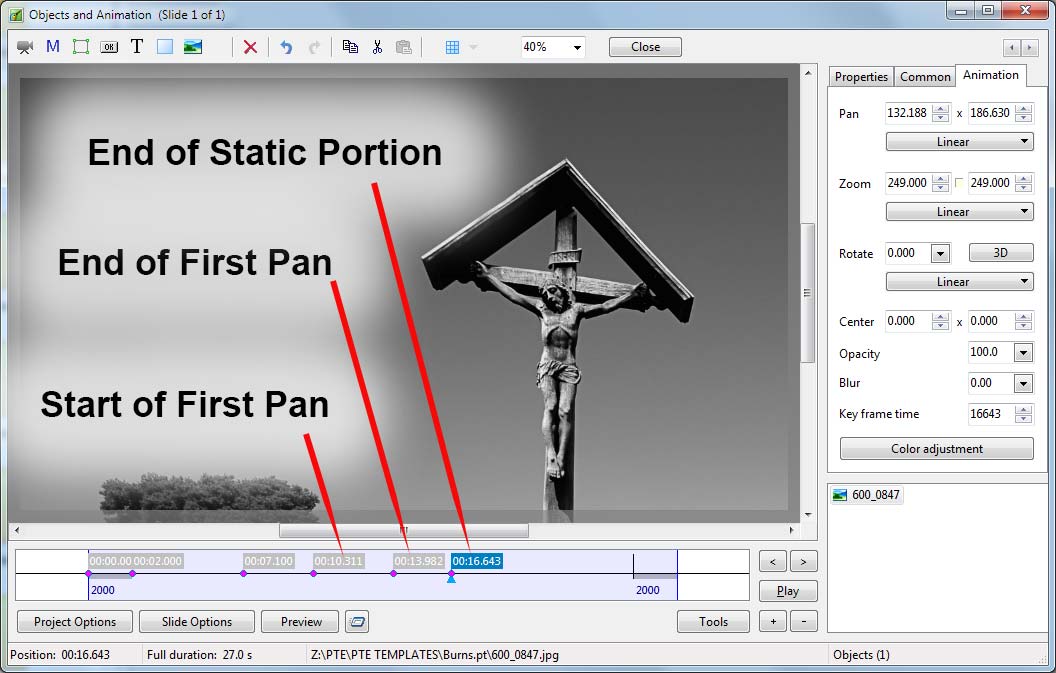
The Key Frame #4 in the above illustration becomes the “Start of the First Pan” in the illustration below.
- Clone the “Start of First Pan” (Key Frame #4) and place at (drag to) the approximate position of the “End of the First Pan”
- Apply the desired amounts of Zoom and Pan to the Image as shown below
- Clone the “End of First Pan” Key Frame (Key Frame #5) and place at the approximate position of the next “End of Static Portion”
Second Pan
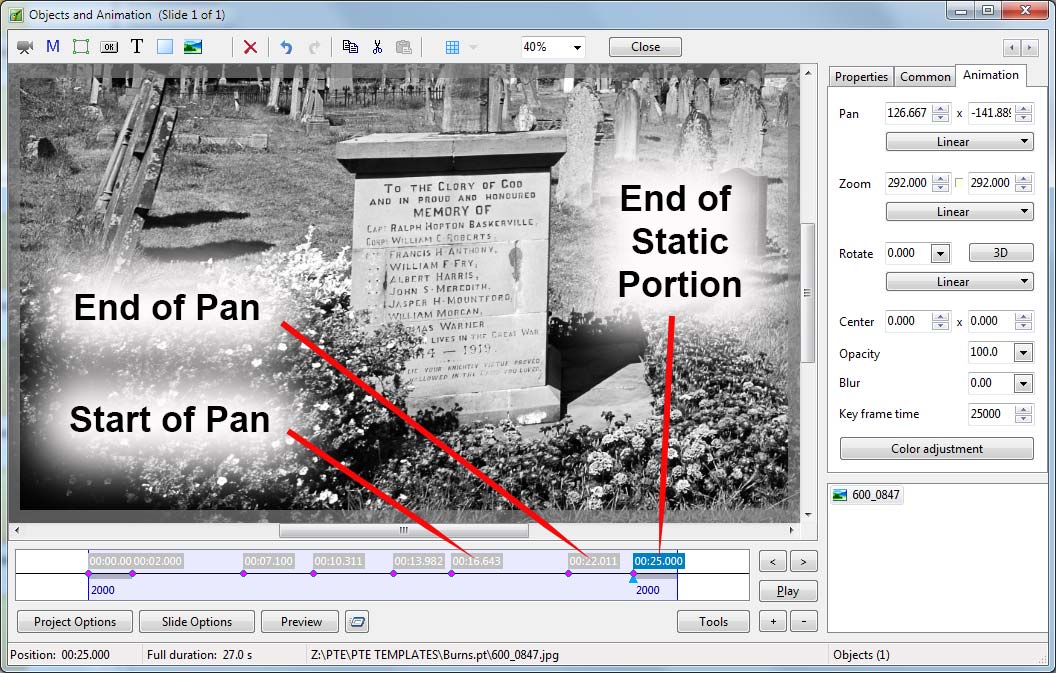
The Key Frame #6 in the above illustration becomes the “Start of the Second Pan” in the illustration below.
- Clone the “Start of the Second Pan” (Key Frame #6) and place at (drag to) the approximate position of the “End of the Second Pan”
- Apply the desired amounts of Zoom and Pan to the Image as shown below
- Clone the “End of the Second Pan” Key Frame (Key Frame #7) and place at the approximate position of the next “End of Static Portion”
The positions of all Key Frames can now be adjusted to give the best combination of Zooms, Pans and Static Portions.
Linearity
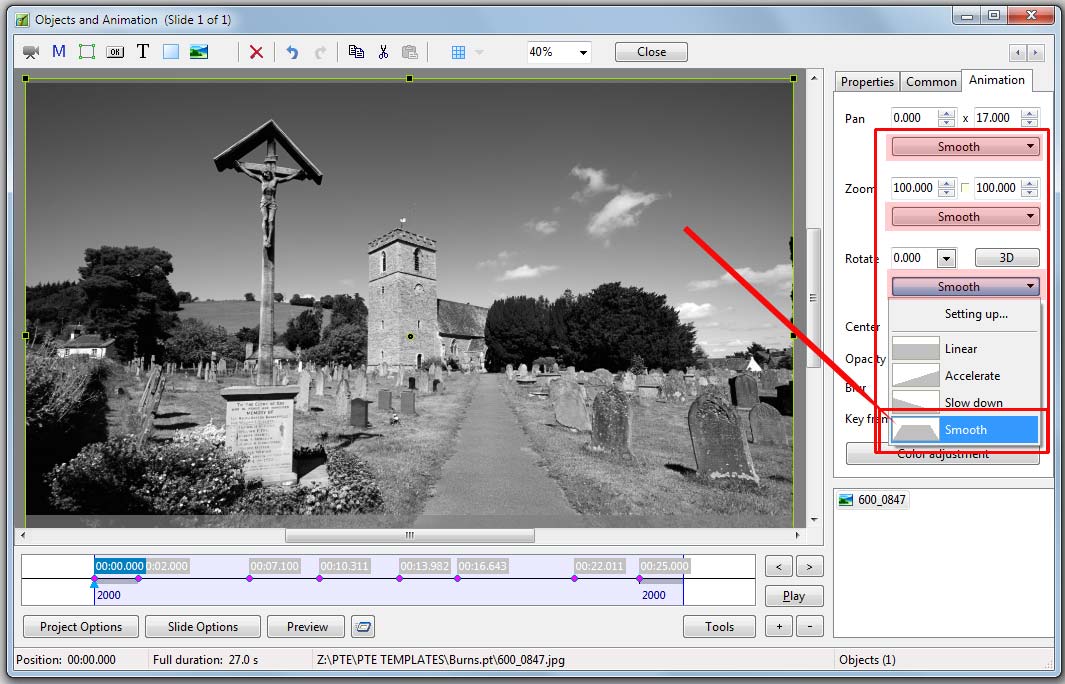
Using the LINEAR setting for Pan, Zoom and Rotate can give rise to “jerky” animations and at this stage a change to the SMOOTH setting might be required.
- Click on each of the Linear Tabs and change LINEAR to SMOOTH from the dropdown Menu
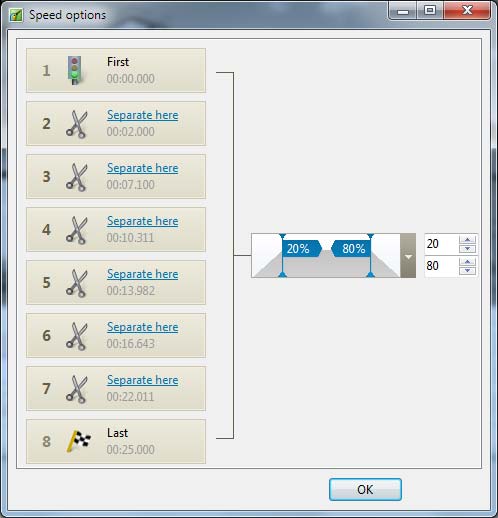
- Next, click on SMOOTH for the PAN settings and then Click on Setting Up to get the Speed Options window
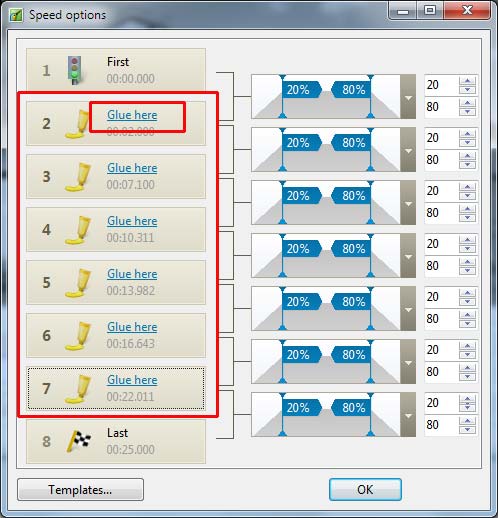
- Click on all of the “Separate here” text links which become “Glue here”
- Click on OK
- Repeat this procedure for each of the Zoom and Rotate SMOOTH settings
- The Tabs will now be labelled CUSTOM
- PLAY the slide and make any final adjustments to the positions of the Key Frames
Demo
en-us/9.0/techniques/kenburns.txt · Last modified: by 127.0.0.1
